Connect with us

HEALTH & LIFESTYLE

8 Effective Ways to Whiten Your Teeth with Baking Soda

Published

on

By

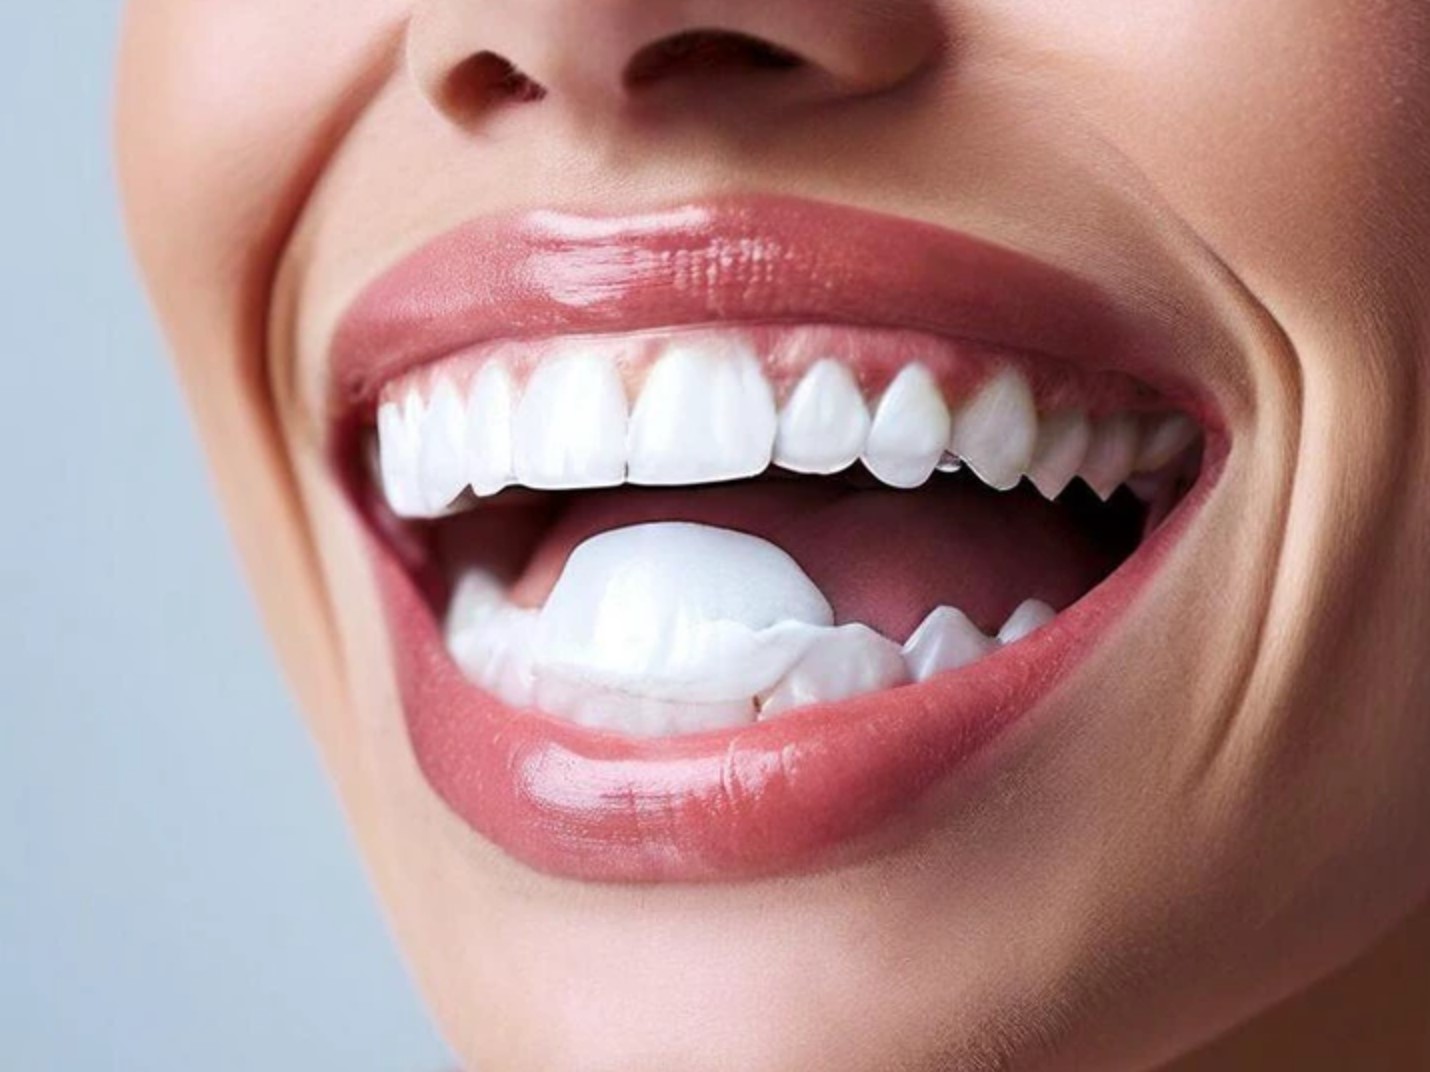
Are you looking for a simple, affordable, and natural way to achieve a brighter, whiter smile? Look no further than baking soda! Baking soda is also known as sodium bicarbonate. It is a white, crystalline powder that has a wide range of uses, from baking and cleaning to personal care and oral hygiene.

Baking soda is a mild alkaline compound with a pH of around 8.3. This means that it can help neutralize acids in the mouth. In addition, Baking soda’s alkalinity also makes it an effective cleaning agent, as it can help dissolve and remove stubborn stains and buildup. In this article, we’ll discuss eight ways to use baking soda to safely and effectively whiten your teeth…Click Here To Continue Reading>> …Click Here To Continue Reading>>


Whitening Teeth with Baking Soda

How does Baking Soda Whiten Teeth?

There are several ways in which baking soda works to remove stains and brighten your smile:

1. Mild Abrasive Action

One of the primary ways baking soda whitens teeth is through its mild abrasive properties. When you brush your teeth with baking soda, its tiny particles gently scrub the surface of your teeth, helping to remove surface stains and discoloration caused by factors such as:

  • Drinking coffee, tea, or red wine
  • Smoking or using tobacco products
  • Consuming certain foods and beverages
  • Natural aging process

The abrasive action of baking soda helps to break down and lift away these surface stains, revealing the whiter, brighter enamel beneath.

2. Neutralizing Acids

Another way baking soda helps whiten teeth is by neutralizing harmful acids in the mouth. When you consume sugary or acidic foods and drinks, the bacteria in your mouth feed on these substances and produce acid as a byproduct. This acid can erode tooth enamel, making your teeth more susceptible to staining and discoloration.

Baking soda’s alkaline nature helps neutralize these acids, creating a more balanced oral environment that is less conducive to staining. By regularly using baking soda to brush your teeth, you can help protect your enamel and maintain a whiter, healthier smile.

3. Penetrating Tooth Enamel and Dentin

The science behind baking soda’s whitening power goes beyond just surface stain removal. Research has shown that baking soda can actually penetrate the tooth enamel and dentin, breaking down and removing the compounds that cause staining.

Baking soda’s particles are small enough to reach into the tiny crevices and pores of the teeth, effectively lifting away stubborn stains that may have accumulated over time. This deep-cleaning action helps to whiten teeth from the inside out.

4. Antibacterial Properties

In addition to its whitening benefits, baking soda has also been shown to have antibacterial properties. By reducing the presence of harmful oral bacteria, baking soda can help maintain a healthier, whiter smile.

In addition, When you brush your teeth with baking soda, you’re not only removing surface stains but also creating an environment that is less hospitable to stain-causing bacteria. This can help prevent future discoloration and promote overall oral health.

Baking Soda to Treat Acid Reflux

How to Whiten Your Teeth with Baking Soda:8 Methods

There are several ways you can incorporate baking soda into your oral hygiene routine to help whiten your teeth. Here are some popular methods:

1. Baking Soda and Water Paste

The simplest way to use baking soda for teeth whitening is to create a paste using equal parts baking soda and water. Here’s how:

  • Mix 1 teaspoon of baking soda with 1 teaspoon of water in a small bowl until a paste forms.
  • Dip your toothbrush into the paste and gently brush your teeth for about 2 minutes, focusing on areas with the most visible stains.
  • Rinse your mouth thoroughly with water.
  • Repeat this process once or twice a week for best results.

For an extra boost of freshness, you can add a drop of peppermint essential oil to the paste. This will not only provide a pleasant taste but also help freshen your breath.

2. Baking Soda and Hydrogen Peroxide Paste

For more intense whitening, combine baking soda with hydrogen peroxide:

  • Mix 1 teaspoon of baking soda with 2 teaspoons of hydrogen peroxide to create a paste.
  • Apply the paste to your teeth using a soft-bristled toothbrush and gently brush for 1-2 minutes.
  • Rinse your mouth thoroughly with water.
  • Use this method once a week, as hydrogen peroxide can be harsh on your teeth and gums if used too frequently.

Hydrogen peroxide is a well-known bleaching agent that can help to whiten teeth by breaking down tough stains. When combined with baking soda, the two ingredients work together to create a powerful whitening solution.

The baking soda gently scrubs away surface stains. The hydrogen peroxide penetrates deeper to break down stubborn discoloration.

However, it’s essential to use a low concentration of hydrogen peroxide (3%). You should also limit the frequency of use to avoid potential side effects like tooth sensitivity and gum irritation.

3. Baking Soda and Toothpaste

Add baking soda to your regular toothpaste for an extra whitening boost:

  • Pour a small amount of baking soda into a shallow dish.
  • Apply a pea-sized amount of toothpaste to your toothbrush, then roll the toothpaste in the baking soda to coat it.
  • Brush your teeth as usual, then rinse thoroughly with water.
  • Use this method every other day for up to 2 weeks, then reduce it to once or twice a week for maintenance.

When combining baking soda with toothpaste, it’s best to use a fluoride-based toothpaste to help protect your teeth from decay. Look for toothpastes that are low in abrasiveness and contain gentle whitening ingredients like hydrogen peroxide or carbamide peroxide.

Avoid using whitening toothpastes that contain harsh abrasives like silica, as these can damage your tooth enamel when combined with baking soda.

4. Baking Soda Mouthwash

You can create a baking soda mouthwash for a quick and easy whitening solution:

  • Dissolve 1 teaspoon of baking soda in a cup of water.
  • Swish the solution around in your mouth for 30 seconds to 1 minute.
  • Spit out the mouthwash and rinse your mouth with water.
  • Use this mouthwash once a day for best results.

Using a baking soda mouthwash can help to freshen your breath, neutralize acids, and gently whiten your teeth over time. In addition, The alkaline nature of baking soda helps to create an environment that is less conducive to the growth of harmful bacteria.

Differences Between Baking Soda and Epsom Salt

5. Baking Soda and Lemon Juice Paste

Lemon juice contains citric acid, which can help to naturally whiten teeth:

  • Mix 1 teaspoon of baking soda with enough lemon juice to create a paste.
  • Apply the paste to your teeth using a soft-bristled toothbrush and gently brush for 1-2 minutes.
  • Rinse your mouth thoroughly with water.
  • Use this method once a week, as the acidity of lemon juice can erode tooth enamel if used too frequently.

While lemon juice can be an effective natural whitening agent, it’s important to use it sparingly and with caution. The high acidity of lemon juice can erode tooth enamel over time, leading to sensitivity and increased risk of decay.

To minimize the potential for enamel damage, always dilute lemon juice with water or baking soda, and limit the frequency of use to once a week or less.

After using lemon juice and baking soda paste, rinse your mouth thoroughly with water and wait at least 30 minutes. READ FULL STORY HERE>>>CLICK HERE TO CONTINUE READING>>>

6. Baking Soda and Coconut Oil Paste

Coconut oil has gained popularity for its potential oral health benefits, including teeth whitening:

  • Mix 1 teaspoon of baking soda with enough coconut oil to form a paste.
  • Brush your teeth with the paste for 1-2 minutes.
  • Rinse your mouth thoroughly with water.
  • Repeat 2-3 times a week for optimal results.

Coconut oil is a natural antibacterial and antifungal agent that can help to reduce harmful bacteria in your mouth, preventing tooth decay and bad breath. Its lauric acid content also helps to break down plaque and remove surface stains.

When combined with baking soda, coconut oil can help to whiten your teeth while promoting overall oral health. Plus, the pleasant taste of coconut oil can make the teeth-whitening process more enjoyable.

7. Baking Soda and Strawberry Paste

Strawberries contain malic acid, which can help to remove surface stains from teeth:

  • Mash 1-2 ripe strawberries and mix with 1 teaspoon of baking soda to create a paste.
  • Apply the paste to your teeth using a soft-bristled toothbrush and gently brush for 1-2 minutes.
  • Rinse your mouth thoroughly with water.
  • Use this method once a week, as the acidity of strawberries can erode tooth enamel if used too frequently.

Malic acid, the primary whitening agent in strawberries, is a type of alpha-hydroxy acid (AHA) that is commonly used in skincare products for its exfoliating properties.

When applied to teeth, malic acid can help to break down and remove surface stains, revealing brighter, whiter teeth underneath.

However, like lemon juice, strawberries are highly acidic and can erode tooth enamel if used too frequently or left on the teeth for too long. Always use strawberries in moderation and rinse your mouth thoroughly with water after use.

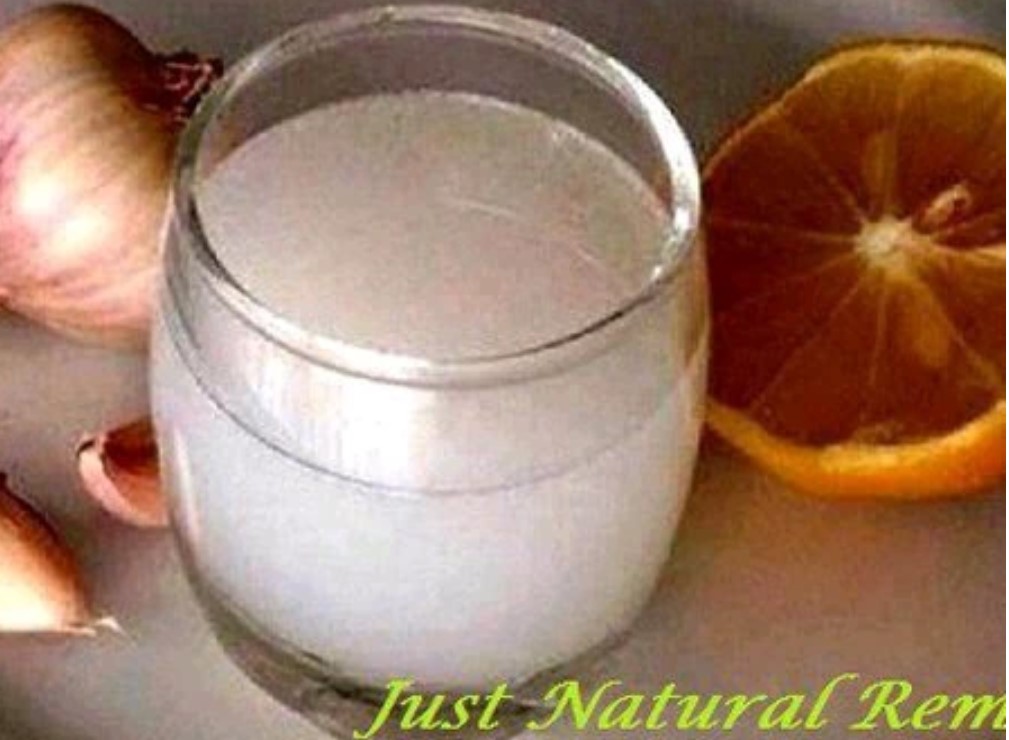
8. Baking Soda and Apple Cider Vinegar Mouthwash

Apple cider vinegar has natural whitening properties that can help to brighten your smile:

  • Mix 1 teaspoon of baking soda with 2 tablespoons of apple cider vinegar and 1/2 cup of water.
  • Swish the solution around in your mouth for 30 seconds to 1 minute.
  • Spit out the mouthwash and rinse your mouth with water.
  • Use this mouthwash once a day for best results.

Apple cider vinegar contains acetic acid, which has been shown to have antibacterial properties. When used as a mouthwash, apple cider vinegar can help to kill harmful bacteria in your mouth, reducing the risk of tooth decay and gum disease.

The mild acidity of apple cider vinegar can also help to remove surface stains and brighten teeth over time.

Apple Cider Vinegar and Baking Soda

Alternative Teeth Whitening Methods

While baking soda can be an effective and affordable way to whiten your teeth, it may not work for everyone or for all types of stains. If you’re looking for alternative teeth whitening methods, consider:

1. Over-the-counter whitening products

Whitening toothpaste, strips, and gels containing hydrogen peroxide or carbamide peroxide can help remove surface stains and gradually whiten teeth.

Look for products with the American Dental Association (ADA) Seal of Acceptance, which indicates that they have been evaluated for safety and effectiveness.

2. Professional whitening treatments

In-office whitening treatments performed by a dentist can provide more dramatic results in a shorter amount of time.

These treatments use higher concentrations of whitening agents and may be more suitable for stubborn stains. Your dentist can also provide custom-fitted whitening trays for at-home use, which can help maintain your results.

Precautions and Potential Side Effects

While baking soda is generally safe and effective for teeth whitening, there are some precautions to keep in mind:

  • Overuse can damage enamel: Baking soda’s abrasive nature can wear away tooth enamel if used too frequently or aggressively. Limit your use of baking soda to once or twice a week, and always use gentle, circular motions when brushing.
  • Not a substitute for regular toothpaste: Baking soda does not contain fluoride, which is essential for preventing cavities and strengthening tooth enamel. Use baking soda in addition to, not as a replacement for, your regular fluoride toothpaste.
  • May cause tooth sensitivity: Some people may experience increased tooth sensitivity after using baking soda, especially if they have receding gums or exposed tooth roots. If you notice any discomfort, discontinue use and consult your dentist.
  • Not suitable for everyone: People with braces, permanent retainers, or other dental work should avoid using baking soda, as it can soften the bonding materials used. Always check with your dentist before starting a new whitening regimen.

Common Questions

1. Is it safe to whiten teeth with baking soda?

Yes, it is generally safe to whiten teeth with baking soda when used in moderation and as directed. However, overuse or aggressive brushing with baking soda can damage tooth enamel, leading to sensitivity and an increased risk of decay.

Always use a soft-bristled toothbrush and gentle circular motions when brushing with baking soda. You should also limit use to 1-3 times a week, depending on the method chosen.

2. How long does it take to see results from whitening teeth with baking soda?

The time it takes to see results from whitening teeth with baking soda varies depending on factors such as the severity of staining, frequency of use, and the specific method employed.

Some people may notice a difference after a single use, while others may require several weeks of consistent use to see significant improvement. Generally, it’s best to use baking soda for teeth whitening consistently for 2-4 weeks to achieve noticeable results.

3. Will baking soda damage my tooth enamel?

When used in moderation and as directed, baking soda should not damage your tooth enamel. However, overuse or aggressive brushing with baking soda can erode enamel over time, leading to sensitivity and increased risk of decay.

To minimize the risk of enamel damage, always use a soft-bristled toothbrush, brush gently, and limit the frequency of use to 1-3 times a week.

4. Can I use baking soda to whiten my teeth if I have braces or permanent retainers?

It’s best to avoid using baking soda for teeth whitening if you have braces, permanent retainers, or other dental appliances. The abrasive nature of baking soda can damage the glue used to attach these appliances to your teeth.

If you want to whiten your teeth and have dental appliances, consult with your dentist or orthodontist for safe and effective options.

5. How often should I whiten my teeth with baking soda?

The frequency of teeth whitening with baking soda depends on the specific method you choose and your individual needs.

In general, it’s best to limit the use of baking soda for teeth whitening to 1-3 times a week to avoid potential enamel damage and sensitivity issues. Some methods, such as baking soda and hydrogen peroxide paste, should be used even less frequently (once a week).


READ FULL STORY HERE>>...CLICK HERE TO CONTINUE READING>>>
Continue Reading
Click to comment

Leave a Reply

Your email address will not be published. Required fields are marked *

HEALTH & LIFESTYLE

These bugs emerge at night and assault victims, killing them silently or infecting them for life.

Published

on

By

As a young child Emiliana Rodríguez recalls watching friends play a nighttime game of soccer, where one of the players suddenly dropped dead on the field. Not knowing what had happened, the Bolivian-born Rodríguez grew fearful of the night, afraid of the silent killer called Chagas, the “monster” she was told only comes out at night.

Chagas is a different kind of monster, a “silent and silenced disease,” transmitted by nocturnal bugs that infect up to 8 million people each year, and Rodríguez’ friend was one of 12,000 people killed each year…Click Here To Continue Reading>> …Click Here To Continue Reading>>


An acute Chagas disease infection with swelling of the right eye (Romaña’s sign) / Wikipedia Commons

Kissing bugs mostly live in the walls of low-income housing in rural or suburban areas and are most active at nighttime when people are sleeping. The bug passes the T. cruzi infection by biting an animal or human, then defecating on the skin of its victim, who may accidentally scratch the spot and break the skin, or spread the feces into the eyes or mouth.

According to the Centers for Disease Control and Prevention (CDC), in Mexico, Central America, and South America, approximately 8 million people–6 to 7 million worldwide as reported by the World Health Organization (WHO)– have Chagas disease, the majority unaware of their infection. When left untreated, the lifelong infection can be a killer. About 12,000 people die of Chagas each year, killing “more people in Latin America than any other parasite disease, including malaria,” writes the Guardian.

Though these bugs have been identified in the U.S.–close to 300,000 people are infected–it is not considered an endemic.

Some people never develop symptoms but CDC reports that decades later, 20 to 30% have cardiac complications that can lead to death, or gastrointestinal complications, which can cause severe discomfort.

And the global case detection rate is only 10%, which makes treatment and prevention very difficult.

Wikipedia Commons / Bärbel Stock

Looking for some support, Hernández and her daughter Idalia visited several doctors who also knew very little–if anything–about Chagas, or how to treat it. “I was surprised, scared and sad because I thought my daughter was going to die. Above all, I couldn’t find out any reliable information, and this added to my anxiety,” Hernández said.

Finally getting some help from a family member who worked in health care, Idalia received the treatment she needed.

“In Mexico, the authorities say that there aren’t many people affected by Chagas and that it’s under control, but that’s not the situation,” says Hernández. “Medical professionals don’t receive any training and mistake Chagas for other heart diseases. The majority don’t realize there is Chagas in Mexico.”

Chagas is listed by the World Health Organization (WHO) as a neglected tropical disease, meaning it’s not getting attention from the global health policy agenda.

Chagas disease treatment

Colin Forsyth, a research manager at the Drugs for Neglected Diseases Initiative (DNDi), explained that Chagas is neglected partly because “it’s a silent disease that stays hidden for so long in your body … because of the asymptomatic nature of the initial part of the infection.”

Referencing the poor populations, Forsyth continued, “The people affected just don’t have the power to influence healthcare policy. There’s this confluence of biological and social issues that keep it hidden.”

But as Chagas travels to other continents, its visibility is increasing and it’s now known that it can be transmitted through blood transfusions and organ transplants, and from mother to baby during pregnancy or childbirth.

Professor David Moore, a consultant at the Hospital for Tropical Diseases in London, created the Chagas Hub, a UK-based facility with the primary goal of having “more people tested and treated, and to manage the risk of transmission, which in the UK is from mother to child,” he said.

Moore said that progress in eliminating Chagas is “glacial,” and addressing the target set by WHO for a 2030 disease elimination, he said, “I can’t imagine that we’ll be remotely close by 2030. That seems highly unlikely.” READ FULL STORY HERE>>>CLICK HERE TO CONTINUE READING>>>

Chagas can be treated with two medicines, benznidazole and nifurtimox, both on the market 50 plus years, that Moore says is “toxic, unpleasant, not particularly effective.”

It can cure a baby but there’s no guarantee the medications can prevent or curb disease progression in adults.

Shutterstock

As for severe side effects, Rodríguez remembers coming out in hives, feeling dizzy and nauseated. She completed treatment and goes for check-ups every year.

Moore adds that more effective medication for Chagas is critical in curbing its spread but right now, there’s no financial appeal to pharmaceutical companies.

Until there’s a higher market appeal to develop more treatments, Hernández is on a mission to make the silent disease louder, in her title as president of the International Federation of Associations of People Affected by Chagas Disease (FINDECHAGAS).

What should I do if I find a triatomine bug?

Meanwhile, Rodríguez is in Spain, fighting the “monster,” by bringing awareness to Chagas through a campaign by the Barcelona Institute for Global Health.

“I’m fed up with so much silence,” Rodríguez says. “I want people to talk about Chagas, and to know about it. I want people to get tested and to get treatment.”

And, they are being heard.

The WHO established World Chagas Disease Day, which runs every year on April 14, the day in 1909 when Carlos discovered the first human case. WHO writes that “Global targets for 2030 and milestones are set out to prevent, control, eliminate and eradicate a diverse set of 20 diseases and disease groups.” This includes Chagas.

To prevent a possible infestation, the CDC recommends that you:

  • Seal cracks and gaps around windows, walls, roofs and doors
  • Remove wood, brush and rock piles near your house
  • Use screens on doors and windows and repair any holes or tears
  • Seal holes and cracks leading to the attic, to crawl spaces below the house and to the outside
  • Have pets sleep indoors, especially at night
  • Keep your house and any outdoor pet resting areas clean, in addition to periodically checking both areas for the presence of bugs

If you believe you have come across a kissing bug, it is advised by the CDC not to crush it. Instead, you should carefully place the bug in a container and fill the container with rubbing alcohol or freeze it in water.

Afterward, it is recommended that you take the container with the bug to your local health department or a university laboratory for identification.

It’s quite frightening to think these bugs live in the walls of homes–it’s like those horror stories you hear as a child to be wary of the monster that lives in the walls.

We really hope the WHO makes good on its promise to eliminate Chagas, and other Neglected Tropical Diseases.

Please share this story and help raise awareness on this silent disease!


READ FULL STORY HERE>>...CLICK HERE TO CONTINUE READING>>>
Continue Reading

HEALTH & LIFESTYLE

Can Olive Oil Cause Diarrhea? Potential Side Effects

Published

on

By

Olive oil is a staple in many kitchens. It is praised for its numerous health benefits and versatility in cooking. However, some people may experience an unexpected side effect when consuming olive oil: diarrhea. If you’ve ever wondered, “Can olive oil cause diarrhea?” you’re not alone. In this article, we’ll explore the relationship between olive oil and diarrhea. In addition, we will also provide insights on how to enjoy this healthy oil while minimizing the risk of digestive issues…Click Here To Continue Reading>> …Click Here To Continue Reading>>


Can Olive Oil Cause Diarrhea

What is Diarrhea?

Diarrhea is a common digestive problem characterized by loose, watery stools that occur more frequently than usual. It can be caused by various factors, including infections, food intolerances, medications, and underlying health conditions. Diarrhea can lead to dehydration if not managed properly, as the body loses more fluids and electrolytes than it takes in.

Symptoms of diarrhea may include:

Most cases of diarrhea resolve on their own within a few days, but persistent or severe diarrhea may require medical attention.

What is Olive Oil?

Olive oil is a liquid fat obtained from olives, the fruit of the olive tree. It is a key component of the Mediterranean diet, which is associated with various health benefits. There are several types of olive oil, each with different qualities and uses:

  • Extra virgin olive oil: Made from pure, cold-pressed olives, this is the highest quality and most flavorful olive oil.
  • Virgin olive oil: Also made from pure, cold-pressed olives, but with slightly lower quality than extra virgin.
  • Refined olive oil: Made from a blend of cold-pressed and processed oils, this type has a neutral flavor and higher smoke point.
  • Light olive oil: A refined olive oil that has been processed to have a lighter color and neutral flavor. Despite its name, it has the same calorie content as other olive oils.

Olive oil is rich in monounsaturated fatty acids (MUFAs), particularly oleic acid, which is known for its anti-inflammatory properties. It also contains various antioxidants, such as vitamin E and polyphenols.

Can Olive Oil Cause Diarrhea?

While olive oil is generally well-tolerated, some people may experience diarrhea after consuming it. There are several reasons why this may occur:

1. High-fat content

Olive oil is a fat-rich food, and consuming large amounts of fat can lead to diarrhea in some individuals. This is because excess fat can stimulate the digestive system, leading to more frequent and looser bowel movements. A study published in the journal Nutrients found that high-fat diets can alter gut microbiota and increase the risk of diarrhea.

2. Allergic reactions or sensitivities

Some people may have an allergy or sensitivity to olive oil, which can cause digestive symptoms like diarrhea, bloating, and abdominal pain.

However, true olive oil allergies are rare. A 2019 case report published in the journal Allergy, Asthma & Clinical Immunology described a patient who experienced anaphylaxis after consuming olive oil, highlighting the importance of identifying and managing food allergies.

3. Quality and purity

Low-quality or adulterated olive oil may contain impurities or contaminants that can irritate the digestive system and lead to diarrhea. A 2020 study published in the journal Foods found that some commercial olive oils may contain harmful compounds like plasticizers and pesticides, which can have negative effects on human health.

Factors that may increase the risk of experiencing diarrhea from olive oil include:

  • Consuming large amounts of olive oil, especially if you’re not used to it
  • Introducing olive oil too quickly into your diet
  • Having pre-existing digestive issues or sensitivities, such as irritable bowel syndrome (IBS) or inflammatory bowel disease (IBD)

Other Potential Side Effects of Consuming Too Much Olive Oil

While diarrhea is one of the most common side effects of consuming excessive amounts of olive oil, there are several other potential issues to be aware of:

1. Weight gain

Olive oil is a calorie-dense food, with approximately 120 calories per tablespoon. Consuming large quantities of olive oil can lead to an increased caloric intake, which may result in weight gain if not balanced with physical activity and an overall healthy diet.

2. Increased risk of gallstones

Some studies suggest that a high intake of olive oil may increase the risk of developing gallstones. This is because the high-fat content of olive oil can stimulate the gallbladder to contract and release bile, which can contribute to the formation of gallstones in susceptible individuals.

3. Gastrointestinal discomfort

In addition to diarrhea, consuming too much olive oil can cause other digestive issues such as stomach pain, bloating, and nausea. This is particularly true for individuals with sensitive digestive systems or those who are not accustomed to consuming high amounts of fat.

4. Reduced nutrient absorption

While olive oil is a healthy fat, consuming it in excess may interfere with the absorption of certain nutrients. Fat-soluble vitamins like A, D, E, and K require a moderate amount of dietary fat for proper absorption, but excessive fat intake can hinder this process.

5. Increased risk of acne

Some people may experience an increase in acne breakouts when consuming large amounts of olive oil. This is because the high-fat content can potentially clog pores and lead to the development of acne in susceptible individuals.

6. Potential drug interactions

Olive oil may interact with certain medications, such as blood thinners or diabetes drugs, by altering their absorption or effectiveness. If you are taking any medications, it’s essential to consult with your healthcare provider before significantly increasing your olive oil intake.

7. Exacerbation of acid reflux

For some individuals with gastroesophageal reflux disease (GERD) or acid reflux, consuming large amounts of olive oil may worsen symptoms. The high-fat content can relax the lower esophageal sphincter, allowing stomach acid to flow back into the esophagus, causing discomfort and heartburn.

It’s important to note that these side effects are typically associated with consuming excessive amounts of olive oil and may not occur in everyone. READ FULL STORY HERE>>>CLICK HERE TO CONTINUE READING>>>

Extra Virgin Olive Oil

How to Prevent Diarrhea from Olive Oil?

To minimize the risk of experiencing diarrhea from olive oil, consider the following tips:

1. Start with small amounts

If you’re new to using olive oil, begin with small quantities and gradually increase your intake over time. This allows your body to adapt to the higher fat content. The American Heart Association recommends consuming no more than 2 tablespoons (28 grams) of olive oil per day.

2. Choose high-quality, pure olive oil

Opt for reputable brands and look for certifications like “Extra Virgin” or “Cold-Pressed” to ensure you’re getting a pure, high-quality product. The North American Olive Oil Association (NAOOA) provides a seal of quality assurance for olive oils that meet strict purity and quality standards.

3. Consume olive oil as part of a balanced diet

Incorporate olive oil into a diet that includes a variety of nutrients from whole foods, rather than relying on it as a sole source of fat. The Mediterranean diet, which emphasizes fruits, vegetables, whole grains, lean proteins, and healthy fats like olive oil, has been shown to have numerous health benefits.

4. Be aware of personal sensitivities or allergies

If you suspect you may have an allergy or sensitivity to olive oil, consult with an allergist or gastroenterologist for proper diagnosis and management. They may recommend an elimination diet or allergy testing to identify the trigger.

When to See a Doctor?

In most cases, diarrhea caused by olive oil is temporary and resolves on its own. However, there are instances where medical attention is necessary:

  • Severe or persistent diarrhea lasting more than a few days
  • Signs of dehydration, such as excessive thirst, dark urine, or dizziness
  • Blood in the stool
  • Severe abdominal pain or fever

These symptoms may indicate a more serious underlying condition that requires prompt medical evaluation. For example, persistent diarrhea may be a sign of a chronic digestive disorder like celiac disease or Crohn’s disease. This may require specific management strategies.

Benefits of Olive Oil For Bladder

Alternatives to Olive Oil for Those with Sensitivities

If you find that olive oil consistently causes diarrhea or other digestive issues, there are several alternatives you can consider:

1. Other healthy oils

Avocado oil, coconut oil, and grapeseed oil are nutrient-rich options that may be better tolerated by some individuals. These oils have different flavor profiles and cooking properties, so it’s essential to choose the right oil for the intended use.

2. Non-oil sources of healthy fats

Incorporate foods like nuts, seeds, and avocados into your diet to obtain healthy fats without relying on oils. These foods are also rich in fiber, vitamins, and minerals that support overall health.

3. Cooking methods that require less oil

Experiment with cooking techniques like grilling, roasting, or steaming, which often require less oil compared to frying or sautéing. These methods can also help preserve the natural flavors and nutrients of the ingredients.

FAQs

1. How Much Olive Oil Can Cause Diarrhea?

The amount of olive oil that can cause diarrhea varies from person to person. Some people may experience digestive issues after consuming just a tablespoon, while others can tolerate larger amounts without any problems.

2. Can olive oil cause diarrhea in babies?

Yes, olive oil can cause diarrhea in babies, especially if they are not used to consuming it. Babies have sensitive digestive systems, and introducing new foods too quickly can lead to digestive issues like diarrhea. It’s essential to follow proper guidelines for introducing solid foods to infants and consult with a pediatrician.

3. Can cooking with olive oil cause diarrhea?

Cooking with olive oil is unlikely to cause diarrhea if consumed in moderation as part of a balanced diet. However, if you are sensitive to olive oil or consume large amounts of it, you may experience digestive issues like diarrhea. It’s essential to choose high-quality olive oil and use it in appropriate quantities to minimize the risk of adverse effects.

4. Can rancid olive oil cause diarrhea?

Yes, rancid olive oil can cause diarrhea and other digestive issues. When olive oil becomes rancid, it undergoes chemical changes that can produce harmful compounds like peroxides and aldehydes.

Consuming rancid olive oil can irritate the digestive system and lead to symptoms like diarrhea, nausea, and abdominal pain. To avoid rancidity, store olive oil in a cool, dark place and consume it within a few months of opening.

5. How long does diarrhea from olive oil last?

Diarrhea from olive oil usually lasts for a few hours to a day, as the body works to digest and eliminate the excess fat. However, if diarrhea persists for more than a few days or is accompanied by severe symptoms like dehydration or bloody stools, it’s essential to seek medical attention. Persistent diarrhea may indicate a more serious underlying condition that requires specific treatment.

6. Can you get diarrhea from eating too much olive oil?

A: Yes, consuming large amounts of olive oil can cause diarrhea, especially if you are not used to eating a high-fat diet. Olive oil is a concentrated source of fat, and consuming too much of it can overwhelm the digestive system and lead to loose, watery stools.

To prevent diarrhea, it’s essential to consume olive oil in moderation and gradually increase your intake over time to allow your body to adapt.

The Bottom Line

While olive oil is generally considered a healthy addition to most diets, it can cause diarrhea in some individuals, especially when consumed in large amounts. By starting with small quantities, and choosing high-quality EVOO, you can minimize the risk of digestive issues. If you experience persistent or severe diarrhea after consuming olive oil, consult with your healthcare provider.


READ FULL STORY HERE>>...CLICK HERE TO CONTINUE READING>>>
Continue Reading

HEALTH & LIFESTYLE

Say Goodbye to Unwanted Hair with Garlic

Published

on

By

Are you tired of spending too much time shaving or dealing with irritating hair removal techniques? Look no further than your kitchen for a natural solution. Garlic might just be the secret ingredient you need to reduce and potentially get rid of unwanted facial, body, and pubic hair. In this article, we will explore how you can use garlic for hair removal and enjoy the benefits of smoother skin…Click Here To Continue Reading>> …Click Here To Continue Reading>>


The Power of Garlic

Garlic is not only a versatile ingredient in our favorite recipes but also possesses potent medicinal properties. Did you know that it can inhibit hair growth? The sulfur compounds found in garlic, particularly allicin, have anti-inflammatory and antimicrobial effects, which can gradually weaken hair follicles, ultimately reducing hair growth.

Benefits of Garlic for Hair Removal

Let’s delve into why using garlic for hair removal is a fantastic choice:

Natural and Safe

Unlike chemical hair removal creams that may contain harsh ingredients, garlic is a natural and safe alternative. It is suitable for most people to use, with minimal risk of skin irritation.

Cost-Effective

Save your money! Garlic is an inexpensive option compared to costly treatments like laser hair removal or waxing. Embrace the natural solution without breaking the bank.

Easy to Use

No need to book appointments or leave the house! Garlic is readily available in your kitchen, making it incredibly convenient to use in the comfort of your home.

Simple Garlic Hair Removal Method

Here’s a step-by-step guide on how to use garlic for hair removal:

Ingredients:

  • 3-4 garlic cloves
  • Olive oil or coconut oil (optional, for sensitive skin)

Instructions:

1.Prepare the Garlic: Peel the garlic cloves and crush them to release the juice. You can use a garlic press or simply crush them with the back of a spoon. READ FULL STORY HERE>>>CLICK HERE TO CONTINUE READING>>>

2.Apply the Garlic Juice: Rub the crushed garlic or the garlic juice directly onto the areas where you want to reduce hair growth. If you have sensitive skin, mix the garlic juice with a small amount of olive oil or coconut oil to dilute its potency and prevent irritation.

3.Leave It On: Allow the garlic juice to sit on your skin for about 20-30 minutes. Don’t worry if you feel a slight tingling sensation; it’s completely normal.

4.Rinse Off: After the designated time, rinse the area thoroughly with warm water and pat dry.

5.Repeat Regularly: For best results, repeat this process daily. Consistent use over several weeks can weaken hair follicles and reduce hair growth.

Additional Tips for Success

Before you embark on your garlic-powered hair removal journey, keep these additional tips in mind:

Patch Test

To ensure you don’t have any adverse reactions, perform a patch test on a small area of your skin before applying garlic to a larger area.

Moisturize

After rinsing off the garlic, apply a gentle moisturizer to keep your skin hydrated and soothe any potential irritation.

Conclusion

Say goodbye to unwanted hair and say hello to smoother, hair-free skin with the power of garlic. This simple, natural remedy offers a cost-effective and safe solution for reducing hair growth. Embrace the benefits of a natural approach to hair removal and enjoy the confidence of smoother skin. Give it a try and experience the wonders of garlic for yourself!

The post Say Goodbye to Unwanted Hair with Garlic appeared first on Timeless Life.


READ FULL STORY HERE>>...CLICK HERE TO CONTINUE READING>>>
Continue Reading

Trending

error: Content is protected !!