
HEALTH & LIFESTYLE
How to Make Your Garlic Bread
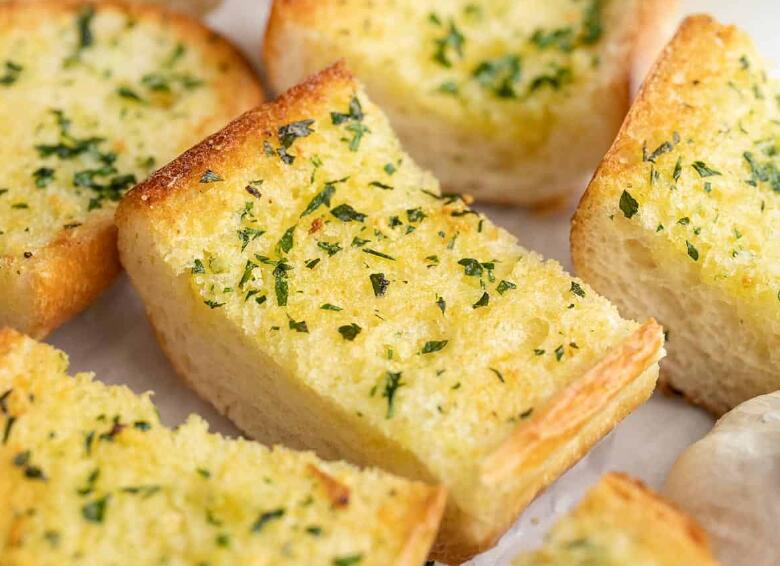
Garlic bread is a classic side dish. It pairs perfectly with pasta and soup. Plus, it can also be enjoyed as a snack on its own. While you can buy pre-made garlic bread from the store, nothing beats the aroma and flavor of homemade. In this article, we’ll provide a complete guide about how to make your garlic bread step by step. In addition, we will also discuss some other great garlic bread recipes…Click Here To Continue Reading>> …Click Here To Continue Reading>>
Health Benefits of Garlic Bread
Garlic bread not only tastes delicious but also offers several health benefits, primarily due to its key ingredient—garlic. Here are some of the benefits associated with garlic bread:
1. Boosts Immunity
Garlic is known for its immune-boosting properties. It contains compounds like allicin. This can help the body fight off infections and illnesses. So enjoying garlic bread can be a tasty way to incorporate garlic into your diet and support your immune system.
2. Heart Health
Garlic has been linked to improved heart health. It may help lower blood pressure and cholesterol levels. This can help reduce the risk of heart disease. Pus, including garlic bread, you can enjoy its cardiovascular benefits.
3. Anti-Inflammatory Properties
Garlic has anti-inflammatory effects that can help reduce inflammation in the body. This is particularly beneficial for people with conditions like arthritis, as it may help alleviate joint pain and stiffness.
4. Antioxidant Benefits
Garlic is rich in antioxidants, which help combat oxidative stress and protect the body from free radicals. This can contribute to overall health and may help reduce the risk of chronic diseases.
5. Digestive Health
Garlic is a prebiotic food, meaning it supports the growth of beneficial gut bacteria. A healthy gut microbiome is essential for good digestion and overall health.
6. Cancer Prevention
Some studies suggest that garlic may have anticancer properties, particularly in reducing the risk of certain types of cancer, such as stomach and colorectal cancer. The sulfur compounds in garlic are thought to play a role in this protective effect.
7. Improved Bone Health
Garlic may help improve bone health by increasing estrogen levels in women. This can be beneficial for bone density. This is particularly important for postmenopausal women at risk of osteoporosis.
8. Flavor Enhancer
Beyond its health benefits, garlic bread is a fantastic flavor enhancer for many dishes. It adds a savory, aromatic element that can elevate the overall dining experience.
Ingredients You’ll Need
To make the perfect garlic bread, gather the following ingredients:
- 1 loaf of French or Italian bread: Choose a fresh loaf for the best texture and flavor.
- 1/2 cup unsalted butter: Softened to room temperature for easy spreading.
- 3-4 cloves of garlic: Minced. Adjust the amount based on your preference for garlic flavor.
- 2 tablespoons fresh parsley: Finely chopped. This adds a nice pop of color and freshness.
- 1/4 teaspoon salt: Enhances the flavors.
- 1/8 teaspoon black pepper: Adds a hint of spice.
Optional Ingredients
- 1/4 cup grated Parmesan cheese: For a cheesy twist.
- 1 teaspoon dried oregano or Italian seasoning: For added flavor.
- Red pepper flakes: If you like a bit of heat.
- Garlic powder: For an extra boost of garlic flavor.
- Onion powder: Adds depth and complexity to the garlic butter.
How to Make Garlic Bread Step By Step?
Step 1: Preheat Your Oven
Begin by preheating your oven to 400°F (200°C). This high temperature will help create a crispy, golden crust on your garlic bread.
Step 2: Prepare the Bread
Take your loaf of bread and slice it lengthwise, creating two halves. Place the bread halves, cut side up, on a baking sheet lined with parchment paper or a silicone baking mat. This will prevent the bread from sticking to the pan.
If you prefer individual slices, cut the loaf crosswise into 1-inch thick slices before spreading the garlic butter.
Step 3: Make the Garlic Butter
In a small bowl, combine the softened butter, minced garlic, chopped parsley, salt, and black pepper. Mix the ingredients together until well incorporated. The garlic should be evenly distributed throughout the butter mixture.
If you prefer a stronger garlic flavor, feel free to add an extra clove or two. For a cheesier version, you can also stir in 1/4 cup of grated Parmesan cheese.
Step 4: Spread the Garlic Butter
Using a butter knife or spoon, generously spread the garlic butter mixture over the cut sides of the bread. Make sure to cover every nook and cranny for maximum flavor.
If you’re using individual slices, spread the butter evenly over the top of each slice.
Step 5: Bake the Garlic Bread
Place the prepared bread in the preheated oven and bake for 10-12 minutes, or until the edges are golden brown and crispy. Keep an eye on it to prevent burning.
If you prefer a softer garlic bread, bake for a shorter time. For a crispier texture, you can leave it in the oven for a few extra minutes.
Step 6: Broil for Extra Crispiness (Optional)
For an extra crispy top, switch your oven to the broil setting and broil the garlic bread for 1-2 minutes, keeping a close eye on it to prevent burning. The high heat will create a delightful crunch on the surface of the bread.
Step 7: Slice and Serve
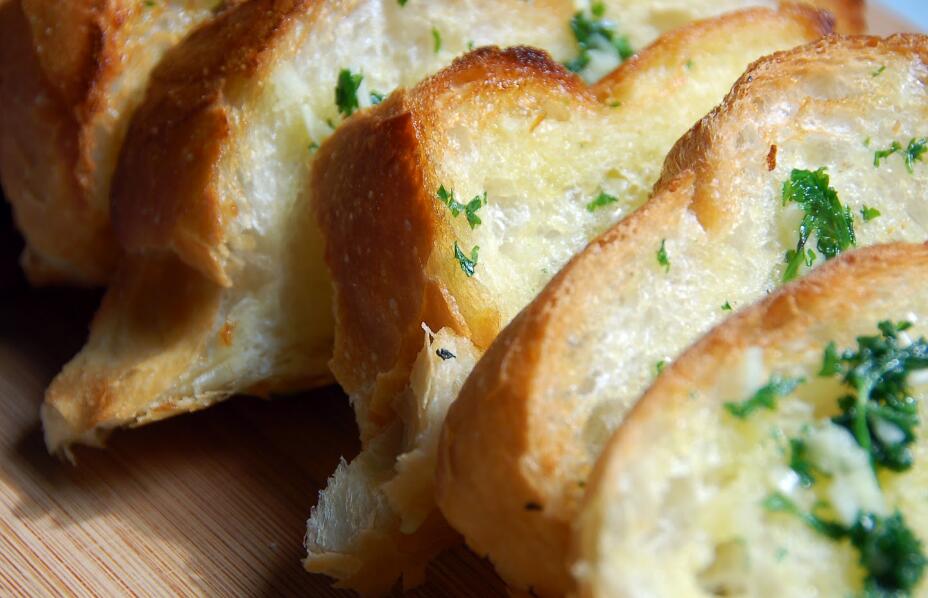
Once the garlic bread is out of the oven, let it cool for a minute or two. Then, using a sharp knife, slice the bread into individual pieces, cutting across the width of the loaf.
Serve your homemade garlic bread warm, alongside your favorite pasta dish, or soup. The aroma and flavor will have your family and guests begging for more.
Tips for the Best Garlic Bread
- Use Fresh Ingredients: Fresh garlic and high-quality butter will significantly enhance the flavor of your garlic bread.
- Adjust Garlic to Taste: If you’re a garlic lover, don’t hesitate to add more cloves. Conversely, if you’re sensitive to garlic, start with fewer cloves and adjust to your liking.
- Experiment with Herbs: Fresh or dried herbs like oregano, thyme, or basil can add a unique twist to your garlic bread.
- Storage: If you have leftovers, store them in an airtight container at room temperature for up to 3 days. To reheat, simply place the slices on a baking sheet and warm them in a 350°F (175°C) oven for 5-7 minutes.
Variations of Classic Garlic Bread
While the classic garlic bread is delicious on its own, there are many ways to customize it to your liking:
1. Cheesy Garlic Bread
After spreading the garlic butter on the bread, top it with shredded mozzarella or grated Parmesan cheese. Bake as usual, and enjoy the melty, cheesy goodness. The cheese adds a rich, creamy texture that complements the garlic perfectly.
2. Garlic Knots
Instead of a loaf, use pizza dough or refrigerated biscuit dough. Cut the dough into small pieces, roll them into balls, and tie them into knots. Bake according to the recipe instructions, then brush with the garlic butter mixture. These knots are fun to eat and make a great appetizer or party snack. READ FULL STORY HERE>>>CLICK HERE TO CONTINUE READING>>>
3. Garlic Bread Sticks
Cut the bread into long, thin strips before spreading the garlic butter. Bake until crispy and golden brown, then serve with marinara sauce for dipping. These sticks are perfect for kids and adults alike, providing a fun way to enjoy garlic bread.
4. Roasted Garlic Garlic Bread
For a milder, sweeter garlic flavor, roast the garlic cloves in the oven before mixing them into the butter. Simply wrap unpeeled garlic cloves in foil and roast at 400°F (200°C) for 30-40 minutes until soft and fragrant. Roasted garlic adds a rich, caramelized flavor that elevates the dish.
5. Herb-Infused Garlic Bread
You can infuse garlic butter with additional flavors by adding herbs such as rosemary, thyme, or dill. Simply mix the chopped herbs into the butter along with the garlic for a fragrant twist. This variation can complement a variety of main dishes and adds a gourmet touch to your garlic bread.
6. Garlic Bread Bites
Cut the bread into small cubes, toss them with the garlic butter mixture, and bake until golden brown and crispy. These bite-sized pieces are perfect for dipping in soups or sauces. They also make a great party snack or appetizer.
7. Sweet Garlic Bread
For a unique twist, try adding a touch of sweetness to your garlic bread. Mix in a little honey or maple syrup to the garlic butter for a sweet-savory flavor. This variation pairs well with cheese or as a side to roasted meats.
8. Garlic Bread with Sun-Dried Tomatoes
Add chopped sun-dried tomatoes to your garlic butter mixture for a burst of flavor. The tangy sweetness of the tomatoes complements the garlic beautifully, making this variation a delightful addition to any meal.
9. Garlic and Cheese Pull-Apart Bread
You can also use a round loaf of bread and slice it into a grid pattern. Make sure not to cut all the way through. Stuff the cuts with garlic butter and cheese, then bake until golden and bubbly. This pull-apart bread is perfect for sharing and is sure to impress your guests.
Other Great Garlic Bread Recipes
1. Pull-Apart Garlic Bread
This fun and shareable version of garlic bread is perfect for gatherings.
Ingredients:
- 1 loaf of bread (like a round sourdough)
- 1/2 cup unsalted butter, melted
- 4 cloves garlic, minced
- 1/4 cup fresh parsley, chopped
- 1 cup shredded mozzarella cheese
Instructions:
- Preheat the oven to 375°F (190°C).
- Cut the bread into a grid pattern, making sure not to cut all the way through.
- In a bowl, mix the melted butter, garlic, and parsley. Drizzle the mixture into the cuts of the bread.
- Stuff shredded mozzarella into the cuts.
- Wrap the bread in foil and bake for 15-20 minutes. Unwrap and bake for an additional 5-10 minutes until the cheese is bubbly.
2. Cheesy Garlic Breadsticks
These cheesy garlic breadsticks are perfect for dipping!
Ingredients:
- 1 pizza dough (store-bought or homemade)
- 1/4 cup unsalted butter, melted
- 3 cloves garlic, minced
- 1 teaspoon Italian seasoning
- 1 cup shredded mozzarella cheese
- Marinara sauce for dipping
Instructions:
- Preheat the oven to 425°F (220°C).
- Roll out the pizza dough on a floured surface and cut it into strips.
- In a bowl, mix melted butter, garlic, and Italian seasoning. Brush this mixture over the dough strips.
- Place the strips on a baking sheet and sprinkle with mozzarella cheese.
- Bake for 10-12 minutes until golden and cheese is melted. Serve with marinara sauce.
3. Garlic Parmesan Bubble Bread
This pull-apart bread is a crowd-pleaser!
Ingredients:
- 1 loaf of frozen bread dough, thawed
- 1/2 cup unsalted butter, melted
- 4 cloves garlic, minced
- 1/2 cup grated Parmesan cheese
- 2 tablespoons fresh parsley, chopped
Instructions:
- Preheat the oven to 350°F (175°C).
- Cut the thawed bread dough into small pieces.
- In a bowl, combine melted butter, garlic, and parsley. Toss the dough pieces in this mixture.
- Layer the dough pieces in a greased bundt pan, sprinkling Parmesan cheese between layers.
- Bake for 30-35 minutes until golden brown. Let cool slightly before serving.
FAQs
1. Can I use pre-minced garlic instead of fresh?
While fresh garlic will provide the best flavor, you can use pre-minced garlic in a pinch. Use about 1 teaspoon of pre-minced garlic per fresh clove called for in the recipe.
2. How do I store leftover garlic bread?
Store any leftover garlic bread in an airtight container at room temperature for up to 3 days. To reheat, place the slices on a baking sheet and warm them in a 350°F (175°C) oven for 5-7 minutes.
3. Can I freeze garlic bread?
Yes, you can freeze garlic bread! Prepare the bread as directed, but don’t bake it. Instead, wrap it tightly in foil or plastic wrap and freeze for up to 3 months. When ready to serve, bake the frozen garlic bread directly from the freezer, adding a few extra minutes to the baking time.
4. Can I make garlic bread without butter?
Yes! You can substitute olive oil or a dairy-free butter alternative to make a vegan version of garlic bread. The flavor will be slightly different, but it will still be delicious.
5. How can I make garlic bread spicier?
To add some heat, mix in red pepper flakes or a dash of hot sauce into your garlic butter. You can also use spicy garlic oil for an extra kick.
6. How to Reheat Garlic Bread?
To reheat garlic bread, place the slices on a baking sheet and warm them in a 350°F (175°C) oven for 5-7 minutes. This will help restore the crispy texture and warm the bread through.
7. Can you make a single slice of garlic bread?
Yes, you can make a single slice of garlic bread. Simply take a slice of bread, spread the garlic butter mixture on one side, and bake it on a small baking sheet or in a toaster oven until golden brown and crispy.
8. How can you use up leftover garlic bread?
There are several ways to use up leftover garlic bread:
- Croutons: Cube the bread and toss it with olive oil, garlic powder, and herbs. Bake until crispy for delicious homemade croutons.
- Bread Pudding: Tear the bread into pieces and use it as the base for a savory bread pudding with eggs, cheese, and your favorite mix-ins.
- Stuffing: Incorporate the leftover garlic bread into your favorite stuffing recipe for Thanksgiving or as a side dish.
- Breadcrumbs: Process the bread into crumbs and use them as a coating for chicken, fish, or vegetables.
- Garlic Bread Salad: Tear the bread into bite-sized pieces and toss it with greens, tomatoes, olives, and a balsamic vinaigrette for a unique salad.

HEALTH & LIFESTYLE
Uterine Cancer: Stay Away From These 4 Things To Avoid The Risk Of Being A Victim

-

 METRO10 months ago
Men Are Painting One Fingernail, There’s A Hidden Meaning Behind It Everyone Needs To Know
-

 SPORTS11 months ago
America’s Cup: Panama KO 5-0, Colombia in semi-finals – Soccer
-

 IN-THE-NEWS11 months ago
Two Police Officers Detained Over Civilian’s Death During Illegal Duty In Lagos
-

 METRO7 months ago
Woman let a homeless man take a shower at her house, when he finished, he fainted at what he saw! –
-

 SPORTS10 months ago
France denounces a “massive attack” on its high-speed train network before the opening of the Olympic Games
-

 METRO11 months ago
9-year-old boy ‘whispered 7 chilling words to his mother’ who poisoned him by putting excrement in his IV drip!
-

 ENTERTAINMENT11 months ago
5 Kenyan celebrities who scored A in exmas
-

 IN-THE-NEWS7 months ago
Алматылықтарға жер сілкінісі туралы SMS-хабарлама не себепті келмеді