
HEALTH & LIFESTYLE
16 Benefits of Olive Oil for Hair and How to Use It
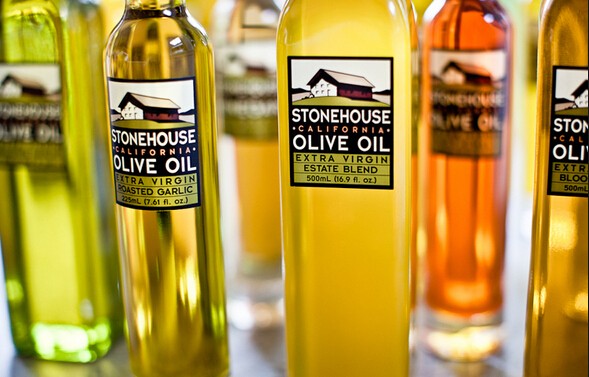
Are you looking for a natural way to nourish and revitalize your hair? Look no further than the liquid gold in your kitchen pantry: olive oil. This Mediterranean staple is not only delicious and healthy for your body, but it also works wonders for your hair. This article will discuss 16 incredible health benefits of olive oil for your hair. In addition, we will also provide useful guide about how to use it at home…Click Here To Continue Reading>> …Click Here To Continue Reading>>
What is Olive Oil?
Olive oil is a liquid fat obtained from olives, the fruits of the olive tree. It is produced by pressing whole olives to extract the oil, which is then used in cooking, cosmetics, pharmaceuticals, and soaps.
There are several grades of olive oil, including:
- Extra virgin olive oil: Made from pure, cold-pressed olives, this is the highest quality and most expensive type of olive oil.
- Virgin olive oil: Also made from pure, cold-pressed olives, but with a slightly lower quality than extra virgin.
- Refined olive oil: This oil is made from a blend of cold-pressed and processed oils.
- Pure olive oil: A blend of extra virgin or virgin olive oil and refined olive oil.
Extra virgin olive oil is considered the healthiest option. Because it contains the highest levels of beneficial compounds like antioxidants and anti-inflammatory substances.
16 Amazing Health Benefits of Olive Oil for Hair
1. Moisturizes Dry, Brittle Hair
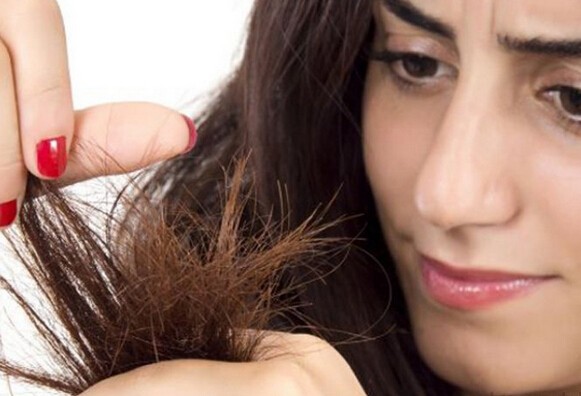
If your hair feels dry and brittle, olive oil is your new best friend. The rich fatty acids in olive oil, especially oleic acid, mimic your hair’s natural oils to deeply moisturize each strand from root to tip. Olive oil is particularly beneficial for curly, coily, and textured hair types that tend to be drier and more prone to breakage.
To use olive oil as a deep conditioning treatment:
- Warm 2-4 tablespoons of olive oil in the microwave or a double boiler until it’s warm but not hot.
- Massage the warm oil into your scalp and work it through your hair, focusing on the ends.
- Cover your hair with a shower cap or plastic wrap and let the oil soak in for 30 minutes to an hour.
- Shampoo and condition your hair as usual. You may need to shampoo twice to remove all the oil.
For an extra boost of moisture, you can try adding a few drops of essential oils like lavender or peppermint to your olive oil treatment.
2. Tames Frizz and Flyaways
Tired of those pesky flyaways and frizzy strands that just won’t behave? A tiny drop of olive oil smoothed over your finished style can instantly tame frizz and add shine without weighing your hair down. This trick works especially well for curly and wavy hair types prone to frizz.
To use olive oil as a frizz tamer:
- Pour a dime-sized amount of olive oil into your palm.
- Rub your hands together to warm the oil and distribute it evenly.
- Gently smooth your hands over your hair, focusing on the ends and any frizzy areas.
- Style your hair as usual.
Be sure to use a light hand when applying olive oil to your hair, as too much can make your hair look greasy. Start with a small amount and add more as needed.
3. Promotes Healthy Hair Growth
The antioxidants and nourishing fats in olive oil can encourage healthy hair growth. Massaging olive oil into your scalp stimulates blood flow to the hair follicles, which may help your hair grow faster and thicker. The vitamin E in olive oil is also essential for healthy hair growth.
To use olive oil as a scalp treatment:
- Warm 1-2 tablespoons of olive oil in the microwave or a double boiler until it’s warm but not hot.
- Part your hair into sections and use a dropper or your fingers to apply the oil directly to your scalp.
- Massage your scalp with your fingertips for 5-10 minutes to stimulate blood flow.
- Leave the oil on your scalp for at least 30 minutes, or overnight for maximum benefits.
- Shampoo and condition your hair as usual in the morning.
Incorporating a weekly or bi-weekly olive oil scalp massage into your hair care routine can help keep your scalp healthy and promote strong, lustrous hair growth.
4. Prevents Damage from Heat Styling
Do you rely on blow dryers, flat irons, and curling wands to style your hair? The heat from these tools can do a number on your delicate strands. But coating your hair with a light layer of olive oil before heat styling can help prevent damage and keep your hair looking healthy.
To use olive oil as a heat protectant:
- Apply a small amount of olive oil to your damp hair, focusing on the ends.
- Comb the oil through your hair to distribute it evenly.
- Style your hair with heat tools as usual.
The olive oil will create a barrier between your hair and the heat, helping to prevent damage and breakage. As a bonus, your hair will look extra shiny and smooth after styling.
5. Offers Sun Protection
Just like your skin, your hair needs protection from the sun’s harmful UV rays. The antioxidants in olive oil, like vitamin E, act as a natural sunscreen for your strands. Before spending time outdoors, comb a small amount of olive oil through your hair to keep it safe from the drying effects of the sun.
To use olive oil as a sun protectant:
- Apply a small amount of olive oil to your hair, focusing on the ends and any exposed areas like your part.
- Comb the oil through your hair to distribute it evenly.
- Style your hair as usual and enjoy your time outdoors!
For extra protection, wear a hat or scarf over your hair when spending prolonged periods in the sun. The combination of olive oil and physical barriers will help keep your hair healthy and vibrant all summer long.
6. Fights Dandruff
If you struggle with a dry, flaky scalp, olive oil could be the solution. The moisturizing properties of olive oil can help soothe irritation and loosen dandruff flakes. Plus, the antibacterial and antifungal properties may help balance your scalp’s microbiome to keep dandruff at bay.
To use olive oil as a dandruff treatment:
- Warm 2-4 tablespoons of olive oil in the microwave or a double boiler until it’s warm but not hot.
- Massage the warm oil into your scalp, focusing on any flaky or irritated areas.
- Cover your hair with a shower cap or plastic wrap and let the oil soak in for at least 30 minutes, or overnight for severe dandruff.
- Shampoo your hair thoroughly in the morning, using a fine-toothed comb to gently remove any loosened flakes.
- Repeat this treatment once or twice a week until your dandruff subsides.
For an extra boost, you can add a few drops of tea tree essential oil to your olive oil treatment. Tea tree oil has powerful antifungal properties that can help fight the fungus that causes dandruff.
7. Detangles Knots
Knots and tangles got you down? Olive oil is a gentle, natural detangler that can help you comb through even the toughest snarls. Work a small amount through your damp hair before combing to painlessly remove knots and tangles without breakage.
To use olive oil as a detangler:
- After shampooing, apply a small amount of olive oil to your damp hair, focusing on the ends and any tangled areas.
- Use a wide-toothed comb to gently work through the tangles, starting from the ends and working your way up to the roots.
- Rinse your hair with cool water to seal the cuticle and lock in moisture.
For extra slip and detangling power, try mixing olive oil with a bit of conditioner or aloe vera gel before applying it to your hair.
8. Boosts Shine
Want hair that shines like you just stepped out of a shampoo commercial? Olive oil is the secret to glossy, lustrous locks. The healthy fats reflect light to boost shine, while the moisturizing properties smooth the hair cuticle for a sleek finish.
To use olive oil as a shine serum:
- Pour a dime-sized amount of olive oil into your palm.
- Rub your hands together to warm the oil and distribute it evenly.
- Smooth your hands over your finished hairstyle, focusing on the ends and any dull areas.
- Style your hair as usual and enjoy your glossy, healthy-looking locks!
For an extra boost of shine, try mixing a few drops of olive oil into your regular conditioner or hair mask. Your hair will look and feel incredibly soft and silky. READ FULL STORY HERE>>>CLICK HERE TO CONTINUE READING>>>
9. Strengthens Strands
Olive oil can actually make your hair stronger and more resilient[4]. The omega-3 fatty acids in olive oil nourish and strengthen the keratin in your hair, making each strand more resistant to breakage.
To use olive oil as a strengthening treatment:
- Warm 2-4 tablespoons of olive oil in the microwave or a double boiler until it’s warm but not hot.
- Massage the warm oil into your scalp and work it through your hair, focusing on the ends.
- Cover your hair with a shower cap or plastic wrap and let the oil soak in overnight.
- Shampoo and condition your hair as usual in the morning.
For best results, repeat this intensive strengthening treatment once a week. Over time, you’ll notice your hair becoming stronger, thicker, and less prone to breakage.
10. Smooths Split Ends
While the only true cure for split ends is a trim, olive oil can temporarily smooth and seal frayed ends to make your hair look healthier between cuts. Rub a tiny amount of olive oil between your fingers and gently pinch and twist your ends to tame pesky splits.
To use olive oil to smooth split ends:
- Pour a dime-sized amount of olive oil into your palm.
- Rub your hands together to warm the oil and distribute it evenly.
- Gently pinch and twist your split ends between your fingers, working the oil into the hair.
- Style your hair as usual.
For an extra dose of split end-smoothing power, try mixing a few drops of olive oil into your regular leave-in conditioner or hair serum.
11. Enhances Your Natural Texture
Whether your hair is straight, wavy, curly, or coily, olive oil can enhance your natural texture. The moisturizing properties help define your curl pattern, while the smoothing effects can help tame frizz and flyaways for a more polished look.
To use olive oil to enhance your natural texture:
- Apply a small amount of olive oil to your damp hair, focusing on the ends and any frizzy areas.
- Use your fingers or a wide-toothed comb to distribute the oil evenly through your hair.
- Style your hair as usual, using a diffuser or air-drying to enhance your natural texture.
Experiment with using olive oil as a styling product to bring out the best in your hair’s unique texture. You may find that it gives you the perfect amount of definition and control without weighing your hair down.
12. Protects from Pollution
Environmental pollutants like smog, dust, and smoke can damage your hair over time, leading to dryness, breakage, and dullness. But olive oil can act as a barrier to protect your strands from the harmful effects of pollution.
To use olive oil as a pollution protectant:
- Apply a small amount of olive oil to your hair, focusing on the ends and any exposed areas.
- Comb the oil through your hair to distribute it evenly.
- Style your hair as usual and go about your day!
For extra protection, try wearing a hat or scarf over your hair when spending time in heavily polluted areas. The combination of olive oil and physical barriers will help keep your hair healthy and strong, even in the face of environmental stressors.
13. Prevents Hygral Fatigue
If you have curly, kinky, or coily hair, you may be familiar with hygral fatigue – the damage caused by repeated swelling and contracting of the hair shaft due to moisture. Coating your hair with olive oil before washing can help prevent too much water from penetrating the shaft, reducing the risk of hygral fatigue and keeping your curls bouncy.
To use olive oil to prevent hygral fatigue:
- Apply a generous amount of olive oil to your hair, focusing on the ends and any particularly dry or damaged areas.
- Cover your hair with a shower cap or plastic wrap and let the oil soak in for at least 30 minutes, or overnight for maximum benefits.
- Shampoo and condition your hair as usual, using lukewarm water to avoid shocking your strands.
By pre-pooing with olive oil, you’ll help protect your curls from the damaging effects of water and keep them looking healthy and defined wash after wash.
14. Soothes Irritated Scalp
Is your scalp feeling dry, itchy, or irritated? Massaging olive oil directly onto your scalp can help soothe inflammation and restore moisture to flaky, irritated skin. The antioxidants in olive oil also promote overall scalp health to keep your hair growing strong.
To use olive oil to soothe an irritated scalp:
- Warm 1-2 tablespoons of olive oil in the microwave or a double boiler until it’s warm but not hot.
- Part your hair into sections and use a dropper or your fingers to apply the oil directly to your scalp, focusing on any irritated areas.
- Massage your scalp with your fingertips for 5-10 minutes to stimulate blood flow and help the oil penetrate.
- Leave the oil on your scalp for at least 30 minutes, or overnight for maximum benefits.
- Shampoo and condition your hair as usual in the morning.
For an extra soothing boost, try adding a few drops of lavender or chamomile essential oil to your olive oil treatment. These oils have calming properties that can help relieve scalp irritation and promote relaxation.
15. Simplifies Your Routine
Olive oil is a true multitasker that can simplify your hair care routine. This one ingredient can replace your conditioner, detangler, heat protectant, frizz tamer, and shine serum. Streamlining your regimen with olive oil can save you time and money while nourishing your hair.
To use olive oil as an all-in-one hair treatment:
- Apply a small amount of olive oil to your damp hair, focusing on the ends and any dry or damaged areas.
- Use a wide-toothed comb to distribute the oil evenly through your hair and detangle any knots.
- Style your hair as usual, using olive oil to tame frizz, add shine, and protect against heat damage.
With regular use, you may find that olive oil alone is enough to keep your hair healthy, strong, and beautiful – no extra products are needed!
16. Suits All Hair Types
One of the best things about olive oil is that it can work for all hair types and textures. Whether your hair is fine and straight, thick and curly, or somewhere in between, this nourishing oil can help you achieve your healthiest hair.
To find the right olive oil routine for your hair type:
- If you have fine hair, start with a very small amount of olive oil and focus on applying it to your ends only. Too much oil can weigh down fine strands and make them look greasy.
- If you have thick or curly hair, you may need to use more olive oil to fully coat your strands. Focus on applying the oil to your ends and any particularly dry or frizzy areas.
- If you have oily hair, you can still use olive oil – just apply it to your ends only and avoid your scalp. You may also want to shampoo twice to ensure all the oil is removed.
- If you have color-treated hair, olive oil can help keep your color vibrant and prevent fading. Just be sure to use a color-safe shampoo and conditioner to avoid stripping your hair.
Experiment with using olive oil in different ways – as a pre-shampoo treatment, leave-in conditioner, styling aid, or shine serum – to find what works best for your unique hair needs and concerns.
Potential Side Effects and Precautions
While olive oil is generally safe for most people, there are a few potential side effects and precautions to keep in mind:
- Allergic reactions: Some people may be allergic to olive oil. If you experience itching, redness, or swelling after using olive oil on your hair or skin, discontinue use and see a doctor if symptoms persist.
- Clogged pores: Applying olive oil to your scalp may clog your pores and lead to acne or folliculitis
- Greasy hair: Using too much olive oil can make your hair look and feel greasy. Start with a small amount and add more as needed to avoid overdoing it.
- Stained clothing or bedding: Olive oil can stain fabric, so be sure to use a towel or old t-shirt to protect your clothing and bedding when applying olive oil to your hair.
- Interaction with certain hair products: Olive oil may not mix well with some hair products, particularly those containing silicone. If you notice any unusual texture or buildup after using olive oil with your regular hair products, you may need to adjust your routine.
To minimize the risk of side effects, always use high-quality, pure olive oil and perform a patch test on a small area of skin before applying it to your entire head.
If you have any pre-existing scalp conditions or concerns, consult with a dermatologist before incorporating olive oil into your hair care routine.
-

 SPORTS9 months ago
Spain wins the final and its fourth European title
-

 METRO9 months ago
My Mom Left Me Because of My Disability, Years Later I Met Her and My Plan Was Sweet
-

 HEALTH & LIFESTYLE4 months ago
What Side is Your Appendix On: Symptoms, Causes, Treatment
-

 METRO8 months ago
3-Year-Old Boy’s Life Changes After Trip To The Beach, He’s Rushed To ER And Almost Loses Toes
-

 SPORTS9 months ago
Kate Middleton Makes Surprise Appearance at Wimbledon After Cancer Announcement
-
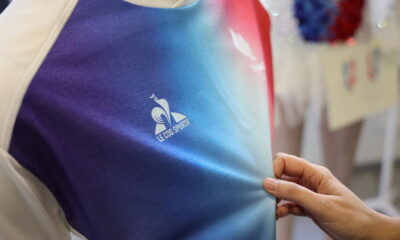
 SPORTS9 months ago
Paris 2024 Olympic Games: a loan of 2.9 million euros to Coq Sportif to ensure the supply of outfits
-

 METRO4 months ago
Waitress Fed A Homeless Man, The Boss Fired Her, 30 Minutes Later, A Man Arrived –
-

 METRO8 months ago
“Pure evil” a man was allegedly stabbed by a female because he refused to give his WiFi password