Connect with us

HEALTH & LIFESTYLE

14 Benefits of Castor Oil for Skin and How to Use

Published

on

By

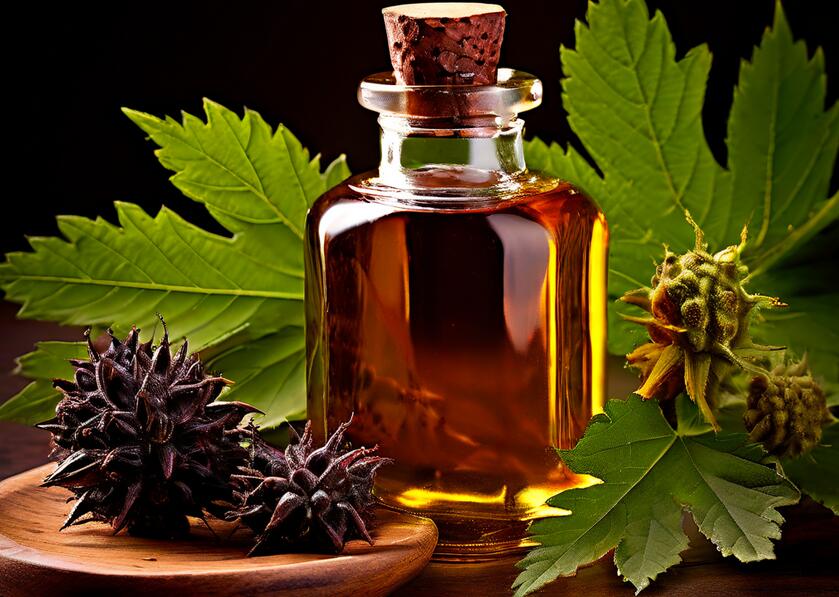
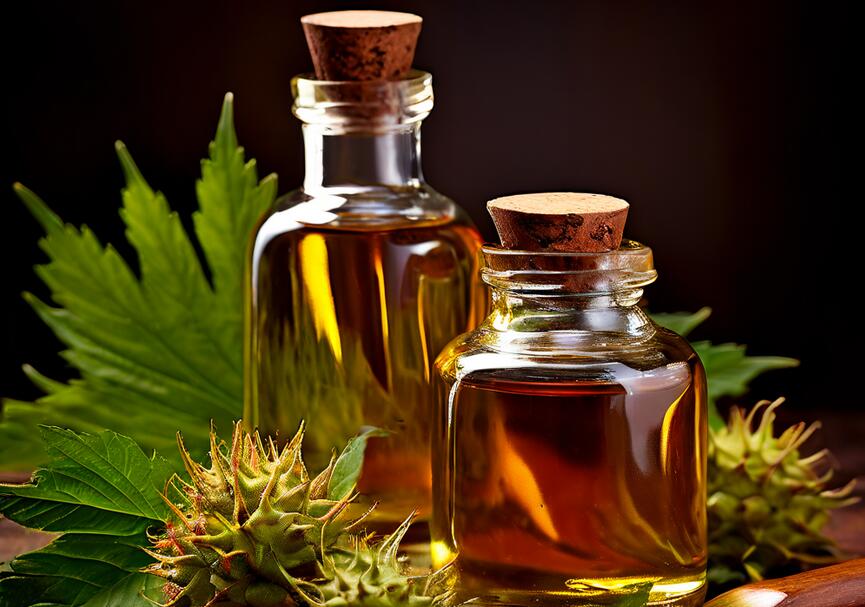
Castor oil is derived from the seeds of the Ricinus communis plant. It has been used for centuries as a natural remedy for various skin concerns. This versatile oil is rich in fatty acids, particularly ricinoleic acid. From moisturizing dry skin to fighting signs of aging, castor oil has gained popularity as a go-to ingredient in many skincare routines. In this article, we’ll explore 14 remarkable benefits of castor oil for your skin and guide how to incorporate it into your daily regimen.

What is Castor Oil?

Castor oil is a vegetable oil obtained by pressing the seeds of the castor plant. It is unique in its composition, containing up to 90% ricinoleic acid, a monounsaturated fatty acid with anti-inflammatory and antimicrobial properties. The oil also contains other beneficial fatty acids, such as oleic acid and linoleic acid.

Historically, castor oil has been used in traditional medicine and skincare for centuries. It was prized by ancient civilizations, including the Egyptians. In modern times, castor oil has gained recognition for its numerous skincare benefits…Click Here To Continue Reading>> …Click Here To Continue Reading>>


Fatty Acid Percentage in Castor Oil
Ricinoleic Acid 85-95%
Oleic Acid 2-6%
Linoleic Acid 1-5%
Stearic Acid 0.5-1%
Palmitic Acid 0.5-1%
Castor Oil for Skin

14 Benefits of Castor Oil for Skin

Castor oil offers a wide range of benefits for the skin. Let’s dive into the various ways castor oil can improve your skin health.

1. Moisturizes and Nourishes

Castor oil is rich in fatty acids, particularly ricinoleic acid, which deeply moisturizes and nourishes the skin. Its thick consistency creates a protective barrier, locking in hydration and preventing moisture loss. Regular use of castor oil can help combat dryness, flakiness, and rough patches, leaving your skin soft, supple, and radiant.

The high concentration of omega-6 and omega-9 fatty acids in castor oil also helps to maintain the skin’s natural moisture balance. These fatty acids are essential for healthy skin cell membranes. This plays a crucial role in retaining moisture and keeping the skin plump and hydrated.

2. Promotes Collagen Production

Collagen is a crucial protein that keeps our skin firm, plump, and youthful. Castor oil penetrates deep into the skin, stimulating the production of collagen and elastin. This helps reduce the appearance of fine lines, wrinkles, and sagging skin, giving you a more youthful and rejuvenated complexion.

The antioxidants present in castor oil, such as vitamin E, also help protect the skin from free radical damage, which can break down collagen and contribute to premature aging. By using castor oil regularly, you can help maintain your skin’s natural collagen levels and keep your skin looking firm and youthful for longer.

3. Fights Acne and Blemishes

Castor oil has powerful antibacterial and anti-inflammatory properties that can help combat acne and blemishes. Ricinoleic acid, the main component of castor oil, fights bacteria that cause breakouts and reduces inflammation in the skin. Applying castor oil to problem areas can help unclog pores, prevent future breakouts, and promote clearer, healthier-looking skin.

In addition to its antibacterial properties, castor oil also contains salicylic acid, a natural exfoliant that helps to remove dead skin cells and unclog pores. This can help prevent the buildup of sebum and bacteria that can lead to acne and blackheads.

4. Soothes Irritated Skin

If you suffer from skin conditions like eczema, psoriasis, or dermatitis, castor oil can provide much-needed relief. Its anti-inflammatory properties help soothe irritated, itchy, and inflamed skin. Castor oil’s moisturizing effects also help alleviate dryness and flakiness associated with these conditions, promoting a more comfortable and balanced complexion.

The ricinoleic acid in castor oil has been shown to reduce inflammation and pain associated with various skin conditions. By applying castor oil to affected areas, you can help calm irritated skin and promote healing.

5. Fades Dark Spots and Evens Skin Tone

Castor oil contains antioxidants that help fade dark spots, hyperpigmentation, and uneven skin tone. These antioxidants neutralize free radicals that can cause damage to the skin, leading to premature aging and discoloration. Regular use of castor oil can help brighten your complexion, resulting in a more even, luminous glow.

The fatty acids in castor oil also help to promote skin cell turnover, which can help fade dark spots and even out skin tone over time. By using castor oil consistently, you can help achieve a more uniform, radiant complexion.

6. Reduces Puffiness and Dark Circles

The anti-inflammatory properties of castor oil can also help reduce puffiness and dark circles around the eyes. Gently massaging a small amount of castor oil around the eye area before bed can help improve circulation, reduce inflammation, and diminish the appearance of dark circles and puffiness over time.

Castor oil’s moisturizing properties also help to plump and hydrate the delicate skin around the eyes, which can help reduce the appearance of fine lines and wrinkles. By using castor oil as part of your regular eye care routine, you can help keep the eye area looking youthful and refreshed.

7. Promotes Wound Healing

Castor oil has been used for centuries to promote wound healing and prevent infection. Its antimicrobial properties help keep wounds clean, while its moisturizing effects create a protective barrier, allowing the skin to heal more efficiently. Applying castor oil to minor cuts, scrapes, and abrasions can speed up the healing process and reduce the risk of scarring.

The ricinoleic acid in castor oil has been shown to stimulate tissue growth and repair, which can help wounds heal faster. Castor oil’s anti-inflammatory properties also help to reduce redness and swelling around the wound, promoting a more comfortable healing process.

Castor Oil for Hair
Castor Oil

8. Nourishes Lips

Dry, chapped lips can be a constant struggle, especially in harsh weather conditions. Castor oil’s moisturizing properties make it an excellent natural remedy for nourishing and softening the lips. Apply a small amount of castor oil to your lips before bed or throughout the day to keep them hydrated, plump, and smooth.

The fatty acids in castor oil help to create a protective barrier on the lips, preventing moisture loss and keeping them soft and supple. You can also mix castor oil with other nourishing ingredients, like honey or coconut oil, to create a custom lip treatment tailored to your needs.

9. Enhances Absorption of Other Skincare Products

Castor oil can also enhance the absorption of other skincare products, making them more effective. Applying a small amount of castor oil before your regular moisturizer or serum can help the active ingredients penetrate deeper into the skin. This will maximize their benefits and improve overall skin health.

The fatty acids in castor oil help to create a protective barrier on the skin, which can help other skincare products stay on the skin longer and penetrate more effectively. This can help you get the most out of your skincare routine and achieve better results over time.

10. Affordable and Versatile

One of the best things about castor oil is its affordability and versatility. A little goes a long way, making it a cost-effective addition to your skincare routine. You can use castor oil on its own or mix it with other natural ingredients like essential oils or carrier oils to create customized skincare blends tailored to your specific needs.

Castor oil can be used in a variety of ways, from a simple moisturizer to a deep-conditioning treatment for your hair. Its versatility makes it a must-have in any natural beauty enthusiast’s toolkit. READ FULL STORY HERE>>>CLICK HERE TO CONTINUE READING>>>

11. Castor Oil as a Natural Makeup Remover

Castor oil’s thick, viscous texture makes it an effective natural makeup remover. Simply apply a small amount of castor oil to a cotton pad and gently wipe away makeup, even waterproof mascara. The oil will dissolve the makeup while nourishing your skin with its moisturizing properties.

12. Castor Oil for Soothing Razor Burn and Ingrown Hairs

The anti-inflammatory properties of castor oil can help soothe razor burn and prevent ingrown hairs. After shaving, apply a thin layer of castor oil to the affected area. This will calm irritation, reduce redness, and soften the skin, making it less likely for ingrown hairs to develop.

13. Castor Oil as a Cuticle Oil

Dry, brittle cuticles can benefit from the nourishing properties of castor oil. Massage a small amount of castor oil into your cuticles and nail beds before bed to deeply moisturize and strengthen the delicate skin around your nails. This can also help promote healthier nail growth.

14. Castor Oil for Softening Rough Patches

Rough, dry patches on elbows, knees, and heels can be softened and smoothed with regular application of castor oil. The fatty acids in castor oil deeply penetrate the skin, providing intense hydration to even the most stubborn rough spots. Apply castor oil to these areas before bed, and wake up to softer, smoother skin.

Is Castor Oil Good for Skin

How to Use Castor Oil in Your Skincare Routine

Now that you know the benefits of castor oil for your skin, let’s explore some simple ways to use it in your daily skincare routine.

1. As a Moisturizer

Castor oil makes an excellent natural moisturizer for dry, dehydrated skin. Here’s how to use it:

  • Cleanse your face and pat it dry.
  • Take a few drops of castor oil and warm it between your palms.
  • Gently massage the oil into your skin, using upward circular motions.
  • Allow the oil to absorb for a few minutes before applying any other skincare products.

For an extra boost of hydration, mix a few drops of castor oil with your favorite moisturizer before applying it to your skin. You can also use castor oil as a body moisturizer, focusing on dry areas like elbows, knees, and heels.

2. As a Spot Treatment for Acne

The anti-inflammatory and antimicrobial properties of castor oil make it an effective spot treatment for acne. Here’s how to use it:

  • Cleanse your face and pat it dry.
  • Dip a clean cotton swab into castor oil.
  • Apply the oil directly to the acne spots, avoiding the surrounding skin.
  • Leave the oil on overnight and rinse it off in the morning.

Repeat this process daily until the acne spots have healed. For an extra acne-fighting boost, you can mix a drop of tea tree essential oil with castor oil before applying it to the skin.

3. As a Makeup Remover

Castor oil can effectively dissolve even the most stubborn makeup, including waterproof mascara. Here’s how to use it:

  • Apply a small amount of castor oil to a cotton pad.
  • Gently press the cotton pad against your eye makeup for a few seconds.
  • Wipe the makeup away using gentle, downward strokes.
  • Rinse your face with warm water and follow up with your regular cleanser.

Castor oil is gentle enough to use around the delicate eye area, making it an excellent choice for those with sensitive eyes or skin.

4. In a DIY Face Mask

Castor oil can be combined with other natural ingredients to create a nourishing, skin-loving face mask. Here are a few simple recipes to try:

Hydrating Mask

  • 1 tablespoon castor oil
  • 1 tablespoon honey
  • 1 tablespoon plain yogurt

Brightening Mask

  • 1 tablespoon castor oil
  • 1 teaspoon turmeric powder
  • 1 tablespoon milk

Acne-Fighting Mask

  • 1 tablespoon castor oil
  • 1 teaspoon bentonite clay
  • 1-2 drops of tea tree essential oil

Mix the ingredients together until well combined. Apply the mask to your clean, dry face and leave it on for 15-20 minutes. Rinse the mask off with warm water and follow up with your regular skincare routine.

Skin Type How to Use Castor Oil
Dry Skin Use castor oil as a moisturizer, applying it to damp skin after cleansing.
Oily Skin Mix a small amount of castor oil with a lighter carrier oil, like jojoba or grapeseed oil, to balance the skin’s natural oils.
Combination Skin Apply castor oil to dry areas and use a lighter moisturizer on oily areas.
Sensitive Skin Dilute castor oil with a carrier oil and perform a patch test before applying it to your face.

Precautions and Potential Side Effects

While castor oil is generally safe for most people, there are a few precautions to keep in mind:

  • Castor oil can cause allergic reactions in some people. If you experience redness, itching, or swelling after using castor oil, discontinue use immediately and consult a healthcare professional.
  • Avoid getting castor oil in your eyes, as it can cause irritation. If you accidentally get castor oil in your eyes, rinse thoroughly with water.
  • Castor oil can stain fabrics, so be careful when applying it, and use an old pillowcase or towel to protect your bedding.

Conclusion

Castor oil is a true powerhouse when it comes to promoting healthy, radiant skin. Its moisturizing, anti-inflammatory, and antibacterial properties make it an excellent natural remedy for a wide range of skin concerns. By incorporating castor oil into your skincare routine, you can unlock its incredible benefits and achieve glowing, nourished skin.

FAQs

1. Can I use castor oil on my skin every day?

While castor oil is generally safe for daily use, it’s best to start with 2-3 times a week and see how your skin reacts. If you have particularly sensitive skin, you may want to use it less frequently or dilute it with a carrier oil.

2. How long does it take to see results from using castor oil on the skin?

The time it takes to see results varies from person to person and depends on the specific skin concern you’re targeting. Some people may notice improvements in their skin’s moisture levels and texture within a few days, while others may take several weeks to see significant changes in the appearance of fine lines, dark spots, or acne.

3. Can I mix castor oil with other skincare products?

Yes, you can mix castor oil with other skincare products to enhance their effectiveness and create custom blends tailored to your skin’s needs. However, it’s essential to do a patch test first to ensure you don’t have any adverse reactions to the combination of ingredients.

4. Is castor oil suitable for all skin types?

Castor oil is generally suitable for all skin types, but it’s essential to use it in a way that’s appropriate for your specific skin type. For example, if you have oily skin, you may want to mix castor oil with a lighter carrier oil to avoid clogging your pores.

5. Can I use castor oil to remove makeup?

Yes, castor oil can be used as a natural makeup remover. Simply apply a small amount of castor oil to a cotton pad and gently wipe away makeup. Rinse your face with lukewarm water and follow up with your regular cleanser to remove any residue.


READ FULL STORY HERE>>...CLICK HERE TO CONTINUE READING>>>
Continue Reading
Click to comment

Leave a Reply

Your email address will not be published. Required fields are marked *

HEALTH & LIFESTYLE

If a Fish Bone Enters Your Throat, Don’t Panic Do These Things To Save Your Life

Published

on

By

If a fish bone enters your throat, it’s easy to panic, but staying calm is crucial for ensuring your safety. Fish bones, being sharp and thin, can lodge themselves in the throat, causing discomfort or even pain. Though the situation might seem alarming, immediate action can help alleviate the problem without causing harm.

Stay Calm and Assess the Situation

The first step is to avoid panicking. Anxiety can exacerbate the feeling of discomfort and might make you act impulsively, leading to more harm. Try to breathe deeply and assess how severe the issue is. If you’re able to speak and breathe relatively well, the bone is likely lodged but not blocking your airway, which is a good sign. However, if you are struggling to breathe or swallow, this could be an emergency, and immediate medical assistance is necessary…Click Here To Continue Reading>> …Click Here To Continue Reading>>


Try Swallowing Soft Food

Once you’re calm, a common method to dislodge the bone is to eat soft, malleable food that might push the bone down into the stomach. Foods like bread, banana, or boiled rice can be effective. These items can wrap around the bone, allowing it to move more easily down your esophagus. Make sure to chew the food properly before swallowing to avoid worsening the situation.

Drink Olive Oil or Water

If swallowing food doesn’t work, drinking olive oil or even water might help. Olive oil acts as a lubricant that can coat the throat and esophagus, making it easier for the fish bone to slide down. Warm water can also have a soothing effect and may help push the bone further down. READ FULL STORY HERE>>>CLICK HERE TO CONTINUE READING>>>

Do Not Use Your Fingers to Remove It

Avoid the temptation to reach into your throat with your fingers to pull the bone out. This can cause damage to the tissues or push the bone deeper, making the situation worse. If the bone is visible and easily reachable with tweezers, you might try to remove it gently, but it is better left to a medical professional.

Seek Medical Assistance

If these methods fail, or if the bone is lodged deep in your throat, seek medical attention promptly. Doctors have specialized tools, like endoscopes, to safely remove the fish bone without causing harm to your throat. Waiting too long could lead to complications like infections or tissue damage.

In conclusion, while a fish bone in the throat can be frightening, staying calm and following the right steps can prevent the situation from escalating. If in doubt, never hesitate to consult a doctor.


READ FULL STORY HERE>>...CLICK HERE TO CONTINUE READING>>>
Continue Reading

HEALTH & LIFESTYLE

Things Men Do In Bed That Women Don’t Like (Opinion)

Published

on

By

When it comes to intimacy, guys, in particular, don’t always realise that what they think is best might not be the case. Another evaluation says that most people are not as skilled and nice as they think. Guys often make big mistakes in the basics that turn women off

Here are some mistakes that guys often make when they are close to each other. If you are a man, try not to do these things playing in secret

No matter what happens, most people are strangely quiet during the whole protest. Even if you think that’s fine, your partner will feel tricked. She starts to question whether or not she’s having fun. You can tell your friend how much you value your relationship with them without going overboard…Click Here To Continue Reading>> …Click Here To Continue Reading>>


Things are happening fast.

One of the most well-known mistakes guys make in relationships is to rush things in bed and around the house.

Men often make time to be close, but it takes women much longer to “get in that state of mind.” It starts before you walk into the room, not when you get close for the first time. READ FULL STORY HERE>>>CLICK HERE TO CONTINUE READING>>>

using the same process every time.

People also make the mistake of thinking that methods that worked the first time will still work the second time.

When a woman has her period, her chemical amounts change depending on where she is in her cycle. So, even if her erogenous zone was her neck the last time, it could very well be her leg the next time.

It’s okay if you make a few mistakes in bed, but there’s nothing better than being ready to fix them to make your partner happy.

Thank you for reading. You can use the ideas here to do simple evaluations and make positive progress. Feel free to leave a review and share this post with as many people as you think is appropriate.


READ FULL STORY HERE>>...CLICK HERE TO CONTINUE READING>>>
Continue Reading

HEALTH & LIFESTYLE

Homemade Ginger Beer Recipe: Step by Step Guide

Published

on

By

Are you ready to embark on a flavorful adventure that combines the zesty kick of fresh ginger with the enthusiasm of homemade brewing? Welcome to the world of homemade ginger beer. This refreshing beverage offers a unique flavor experience that’s tasty and healthful. In addition, this is surprisingly easy. You can create a delicious drink that rivals store-bought options with just a few simple ingredients. This article will explore everything you need to know about crafting your homemade ginger beer, from the ingredients to the fermentation process.

What is Ginger Beer?

Ginger beer is a fermented beverage made primarily from ginger, sugar, and water. Traditionally, it was alcoholic, but today, many non-alcoholic versions are available. The drink is known for its spicy kick and effervescence. This makes it a popular choice for cocktails or enjoyed on its own. The fermentation process not only gives ginger beer its characteristic fizz but also enhances its flavor profile…Click Here To Continue Reading>> …Click Here To Continue Reading>>


Homemade Ginger Beer Recip

Types of Ginger Beer

  • Fermented Ginger Beer: This version uses yeast to ferment sugars into alcohol and carbon dioxide. The fermentation process not only adds carbonation but also deepens the flavor profile.
  • Non-Fermented Ginger Beer: Often made with soda or carbonated water for immediate consumption without fermentation. This version tends to be sweeter and lacks the complexity of its fermented counterpart.

Ginger Beer or Ginger Ale?

When it comes to choosing between ginger beer and ginger ale, it’s essential to understand their differences.

  • Flavor Profile: Ginger beer is spicier and more robust due to the fermentation process. It has a stronger ginger flavor that can be quite bold. Ginger ale is typically sweeter and milder, often made with less actual ginger.
  • Fermentation: As mentioned earlier, ginger beer undergoes fermentation, which not only gives it natural carbonation but also introduces complex flavors. In contrast, ginger ale is usually carbonated artificially and may contain little to no real ginger.
  • Uses in Cocktails: Both beverages serve as mixers in cocktails, but they offer different experiences. Ginger beer is often used in cocktails like the Moscow Mule for its strong flavor, while ginger ale can be used in lighter drinks or as a refreshing standalone beverage.

In summary, if you prefer a drink with a kick and depth of flavor, go for homemade ginger beer. If you want something sweeter and milder, ginger ale might be your choice.

Main Ingredients Needed

To create your own delicious homemade ginger beer, you’ll need the following ingredients:

  • Fresh Ginger: About 1 cup, peeled and grated. Fresh ginger provides a vibrant flavor that dried versions simply can’t match.
  • Sugar: 1 cup (white or brown sugar works well). Sugar serves as food for the yeast during fermentation, so don’t skimp on this ingredient!
  • Water: 4 cups of filtered water. Using filtered water ensures that no chlorine or impurities interfere with the fermentation process.
  • Lemon Juice: Juice from 1 lemon (fresh is best). The acidity from lemon juice not only adds flavor but also helps balance the sweetness.
  • Yeast: 1/4 teaspoon of active dry yeast or champagne yeast. Yeast is essential for fermentation; it converts sugars into alcohol and carbon dioxide.

Optional Ingredients

  • Spices: Consider adding cinnamon or cloves for extra flavor. These spices can add warmth and depth to your ginger beer.
  • Fruits: Lime or berries can enhance the taste profile. Adding fruits during fermentation can create delightful flavor combinations.
  • Sweeteners: Honey or agave syrup can be used as alternatives to sugar for a different sweetness profile.

Equipment Required

Before you start brewing, gather these essential tools:

  • Large pot for boiling. This will be used to make your ginger syrup.
  • Fermentation vessel (glass jar or bottle). A clean glass container is ideal for monitoring the fermentation process.
  • Funnel for pouring. A funnel helps prevent spills when transferring liquids between containers.
  • Fine mesh strainer or cheesecloth for filtering. This will help remove solid pieces from your ginger beer.
  • Bottles with caps for storage. Make sure they are clean and sanitized to prevent contamination.

Step-by-Step Homemade Ginger Beer Recipe

1. Preparation of Ginger Root

Start by peeling and grating the fresh ginger. This releases the essential oils and flavors that are crucial for your ginger beer. The fresher the ginger, the more vibrant your drink will taste. You can use a microplane grater for fine grating or chop it into small pieces if you prefer a chunkier texture.

2. Making the Ginger Syrup

In a large pot, combine the grated ginger with sugar and water. Bring this mixture to a boil, stirring until the sugar dissolves completely. Once boiling, reduce the heat and let it simmer for about 10 minutes.

This process extracts flavors from the ginger and creates a syrupy base that serves as the heart of your beverage. The longer you simmer, the stronger the ginger flavor will be.

3. Fermentation Process

After simmering, allow the syrup to cool to room temperature. Once cooled, add lemon juice and yeast. Stir gently to combine all ingredients thoroughly; avoid vigorous stirring that could introduce unwanted oxygen into your mixture.

Cover the mixture with a clean cloth and let it sit at room temperature for 24 to 48 hours. You’ll notice bubbles forming as fermentation begins—this is a good sign! The yeast converts sugars into alcohol and carbon dioxide, creating that signature fizz.

4. Bottling the Ginger Beer

After fermentation, strain the mixture through a fine mesh strainer into another container to remove solid pieces like grated ginger bits. Using a funnel, pour the liquid into bottles, leaving some headspace at the top. This allows room for carbonation buildup during storage. Seal them tightly; this helps maintain carbonation during storage.

5. Second Fermentation (Optional)

For extra fizz, leave your sealed bottles at room temperature for another 2 to 3 days after bottling. Check them daily; if they feel hard when squeezed, they’re ready for refrigeration.

This second fermentation enhances carbonation but requires careful monitoring to avoid over-carbonation—too much pressure can lead to exploding bottles!

6. Refrigeration and Storage

Once bottled, store your ginger beer in the refrigerator. It can last up to two weeks but is best enjoyed fresh! The cold environment slows down fermentation significantly, preserving your hard work while allowing you to enjoy that refreshing fizz whenever you want.

Flavor Variations

Experimenting with flavors can make your homemade ginger beer even more exciting:

  • Add slices of lime or berries during fermentation for fruity notes that complement the spice of ginger.
  • Incorporate spices like cardamom or nutmeg for warmth; these spices can transform your drink into something truly unique.
  • Try infusing herbs like mint or basil for an aromatic twist that elevates your beverage experience.

Common Mistakes to Avoid

When brewing your own ginger beer, keep these pitfalls in mind:

  • Over-fermenting can lead to an overly alcoholic beverage; monitor closely! If left too long, it may become too sour.
  • Using too much sugar may cause excessive carbonation and even bottle explosions—balance is key! Stick closely to the recommended measurements.
  • Bottling too early can result in dangerous pressure buildup; always check readiness before sealing by gently squeezing bottles.
Ginger Beer
Ginger Beer

Nutritional Profile of Ginger Beer

Understanding what goes into your homemade ginger beer can help you appreciate its benefits even more! Here’s a general nutritional breakdown per serving (about 8 oz):

Nutrient Amount
Calories 60 – 80
Carbohydrates 15 – 20 g
Sugars 12 – 18 g
Protein <1 g
Fat 0 g
Sodium <10 mg

Keep in mind that these values can vary based on how much sugar you use and any additional ingredients added.

12 Amazing Health Benefits of Ginger Beer

1. Rich in Antioxidants

Ginger beer contains antioxidants that help combat oxidative stress in the body. Antioxidants are essential for neutralizing free radicals, which can cause cellular damage and contribute to chronic diseases.

Regularly consuming ginger beer can enhance your overall health by providing these protective compounds. The antioxidants found in ginger, such as gingerol and zingerone, have been linked to various health benefits. This includes reducing the risk of chronic conditions like heart disease and cancer.

By incorporating ginger beer into your diet, you’re not just enjoying a tasty drink; you’re also giving your body a fighting chance against oxidative stress.

2. Anti-Inflammatory Properties

One of the standout benefits of ginger is its anti-inflammatory effects. Ginger beer can help reduce inflammation in the body, making it beneficial for those suffering from conditions like arthritis or muscle pain.

The active compounds in ginger, such as gingerol and shogaol, work to inhibit inflammatory responses, providing relief from discomfort.

Studies have shown that these compounds can reduce markers of inflammation in the body. This makes ginger beer an excellent choice for those looking to manage chronic pain or inflammation naturally.

By regularly consuming ginger beer, you may find yourself feeling more comfortable and less hindered by inflammation-related issues.

3. A Natural Remedy for Nausea

If you’ve ever experienced motion sickness or nausea during pregnancy, you might find relief in ginger beer. Studies have shown that ginger can effectively alleviate nausea associated with various conditions, including morning sickness and chemotherapy-induced nausea. READ FULL STORY HERE>>>CLICK HERE TO CONTINUE READING>>>

Drinking ginger beer can be a soothing option when you’re feeling queasy. The spicy flavor of ginger helps stimulate saliva production and digestive juices. This can ease feelings of nausea and promote better digestion overall.

For anyone prone to motion sickness or digestive discomfort, having a bottle of ginger beer on hand can be a game-changer.

4. Supports Digestive Health

Ginger beer is known to promote healthy digestion. The compounds in ginger stimulate the production of digestive enzymes. This can aid in breaking down food and absorbing nutrients more effectively. If you often experience bloating or indigestion, sipping on ginger beer may help ease these symptoms.

Additionally, ginger has been shown to speed up gastric emptying, meaning food moves more quickly through your digestive system. This can be particularly helpful after a heavy meal or when you’re feeling sluggish after eating.

5. Boosts Immune System

Packed with antioxidants and anti-inflammatory properties, ginger beer can also bolster your immune system. Regular consumption may help fend off common illnesses like colds and flu by enhancing your body’s natural defenses against infections.

Ginger’s antimicrobial properties can inhibit the growth of certain bacteria and viruses, making it an effective ally during cold and flu season. Drinking ginger beer regularly may support your immune function and keep you feeling vibrant year-round.

Brain Infection
Brain Infection

6. Enhances Brain Function

Research suggests that ginger may improve cognitive function and memory. Some studies indicate that consuming ginger can enhance reaction time and protect against age-related cognitive decline.

If you’re looking for a natural way to keep your mind sharp, consider incorporating ginger beer into your diet. The anti-inflammatory properties of ginger may also play a role in protecting brain cells from damage caused by oxidative stress. This could potentially lower the risk of neurodegenerative diseases like Alzheimer’s.

By enjoying a refreshing glass of ginger beer, you’re not just treating yourself; you’re also nurturing your brain health.

7. Lowers Cholesterol Levels

Regular intake of ginger has been linked to lower levels of low-density lipoprotein (LDL) cholesterol, also known as “bad” cholesterol. This reduction can contribute to better heart health and lower the risk of cardiovascular diseases.

High cholesterol levels are often associated with an increased risk of heart attack and stroke. Therefore, incorporating heart-healthy beverages like ginger beer into your diet can be beneficial for maintaining optimal cardiovascular health.

Additionally, some studies suggest that the compounds in ginger may improve overall lipid profiles by increasing high-density lipoprotein (HDL) cholesterol levels.

8. Improves Insulin Sensitivity

Ginger has shown promise in improving insulin sensitivity, which is crucial for managing blood sugar levels effectively. This benefit can be particularly valuable for people at risk of developing type 2 diabetes.

Plus, Improved insulin sensitivity means that your body can use insulin more effectively to regulate blood sugar levels. This not only helps prevent spikes but also keeps energy levels consistent throughout the day. Including ginger beer as part of a balanced diet may contribute positively to blood sugar management.

9. Alleviates Menstrual Pain

For many women, menstrual cramps can be debilitating. Ginger has been traditionally used to relieve menstrual pain due to its anti-inflammatory properties. Plus, Drinking ginger beer during your cycle may provide relief from cramps without relying on over-the-counter medications.

10. Acts as a Natural Detoxifier

Ginger beer can aid in detoxification processes within the body. The compounds found in ginger help stimulate digestion and promote sweating. This can assist in flushing out toxins from your system.

A healthy detox process supports liver function and improves overall well-being. It can help rid the body of harmful substances accumulated through diet or environmental exposure.

11. Supports Respiratory Health

The warming properties of ginger make it an excellent remedy for respiratory issues like colds or coughs. Ginger beer can help soothe sore throats and clear congestion. This is especially helpful during cold weather when respiratory illnesses are more common.

The natural warmth from drinking hot or warm ginger tea (or even warm ginger beer) combined with its soothing properties. This makes it an ideal choice when you’re feeling under the weather.

Health Benefits of Ginger Beer

12. A Delicious Alternative to Sugary Sodas

Finally, one of the best benefits of ginger beer is that it serves as a tasty alternative to sugary sodas and soft drinks. Many commercial brands offer low-sugar or diet options that still deliver flavor without the excess calories or artificial ingredients in many sodas.

Choosing healthier beverages like ginger beer not only satisfies cravings but also contributes positively to overall dietary habits. This makes it easier to maintain a balanced lifestyle while still enjoying flavorful drinks.

Potential Side Effects and Risks

While homemade ginger beer offers numerous benefits, it’s essential to be aware of potential side effects:

  • Digestive Issues: Consuming too much ginger may lead to heartburn or digestive discomfort in some people.
  • Blood Thinning: Ginger has blood-thinning properties. If you’re on anticoagulant medications, consult a healthcare professional before indulging in large quantities.
  • Allergic Reactions: Though rare, some people may have allergies to ginger or related plants; always start with small amounts if you’re trying it for the first time.

Moderation is key! Enjoying homemade ginger beer in reasonable amounts allows you to reap its benefits without experiencing adverse effects.

FAQs

1. How long does homemade ginger beer last?

Homemade ginger beer typically lasts about two weeks when refrigerated; however, its best flavor is within the first week after bottling due to freshness.

2. Can I use dried ginger instead of fresh?

While dried ginger can be used in a pinch, fresh ginger provides a more vibrant flavor profile that truly shines in this recipe—it’s worth sourcing fresh if possible!

3. What to do if my ginger beer doesn’t ferment?

Ensure that you used active yeast and that your mixture was kept warm enough during fermentation; sometimes simply moving it to a warmer spot can help kickstart things!

4. Is it safe to consume alcoholic content in homemade ginger beer?

Yes! However, keep in mind that homemade versions may contain low levels of alcohol due to fermentation—enjoy responsibly! If you’re concerned about alcohol content, you can consider using less sugar or shortening fermentation time.


READ FULL STORY HERE>>...CLICK HERE TO CONTINUE READING>>>
Continue Reading

Trending

error: Content is protected !!