
HEALTH & LIFESTYLE
How to Remove Age Spots on Face: 14 Easy Ways
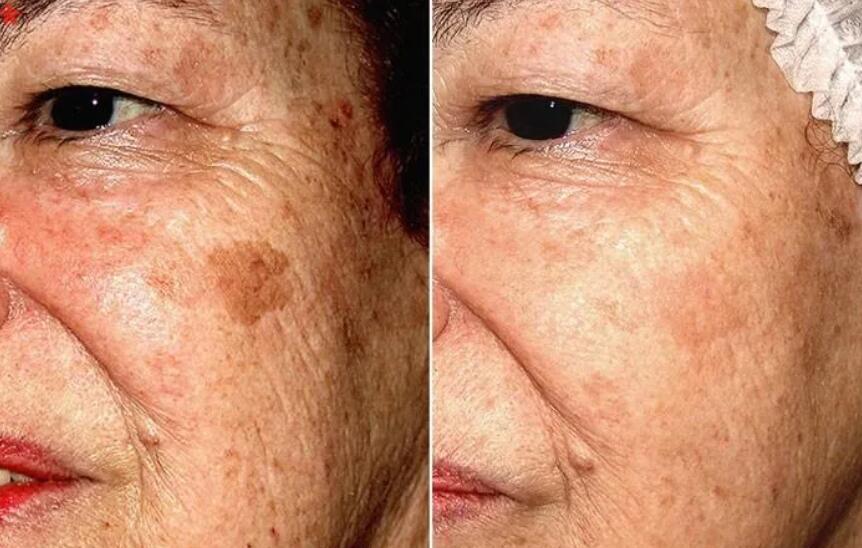
Are you tired of seeing those pesky brown spots on your face? You’re not alone. Age spots, also known as liver spots or solar lentigines. This is a common skin concern for many people as they get older especially those over 50. These flat, brown, or black spots can make you look older than you feel. But don’t worry – there are plenty of ways to fade and even eliminate age spots on your face. In this article, we’ll explore 14 easy ways to remove age spots on the face…Click Here To Continue Reading>> …Click Here To Continue Reading>>
What Causes Age Spots on the Face?
Before we dive into the solutions, let’s talk about what causes age spots in the first place. The main culprit is sun exposure. Over time, the sun’s UV rays damage the skin, causing an overproduction of melanin. This is the pigment that gives skin its color. It can excess melanin clumps together, forming the dark spots we know as age spots.
Other factors that can contribute to age spots include:
- Tanning beds
- Certain medications that increase sun sensitivity
- Hormonal changes during pregnancy or menopause
- Genetics – some people are simply more prone to developing age spots
How to Remove Age Spots on Face: 14 Easy Ways
While you can’t turn back the clock, you can take steps to minimize existing age spots and prevent new ones from forming. Here are 14 ways to do just that:
1. Protect Your Skin from the Sun
One of the most effective ways to prevent age spots from forming or getting darker is to protect your skin from the sun’s harmful UV rays.
Make sure to apply a broad-spectrum sunscreen with an SPF of at least 30 every day, even when it’s cloudy outside. Don’t forget to reapply every two hours, especially if you’re spending time outdoors or sweating a lot.
In addition to sunscreen, you can also protect your skin by:
- Wearing protective clothing, such as long-sleeved shirts, wide-brimmed hats, and sunglasses
- Seeking shade during peak sun hours (usually between 10 am and 4 pm)
- Avoiding tanning beds and sunlamps
Remember, the sun’s UV rays can penetrate through clouds and windows. So it’s important to protect your skin even when you’re not directly in the sun.
2. Try Over-the-Counter Lightening Creams
If you’re looking for a convenient way to fade age spots at home, consider using an over-the-counter lightening cream. Look for products that contain ingredients like:
- Hydroquinone: This is a bleaching agent that can help reduce the appearance of age spots by inhibiting the production of melanin in the skin.
- Kojic acid: Derived from mushrooms, this natural ingredient works by blocking the production of tyrosine, an amino acid that’s necessary for melanin production.
- Vitamin C: This powerful antioxidant can help brighten the skin and fade age spots by inhibiting the production of melanin.
- Retinol: This vitamin A derivative can help speed up cell turnover, which can help fade age spots and improve skin texture.
- Niacinamide: Also known as vitamin B3, this ingredient can help reduce inflammation and even out skin tone.
When using any lightening cream, be sure to follow the instructions carefully and use sunscreen religiously. Because these products can make your skin more sensitive to the sun. It’s also important to be patient, as it can take several weeks or even months to see noticeable results.
Note: If you have sensitive skin or are prone to irritation, look for products that are specifically formulated for sensitive skin.
3. Apply Aloe Vera Gel
Aloe vera is a natural ingredient that’s known for its skin-soothing and lightening properties. It contains aloin, a compound that can help fade age spots and even out skin tone.
To use aloe vera for age spots, simply apply fresh aloe vera gel directly to the affected areas and let it sit for about 30 minutes before rinsing off with lukewarm water. Repeat this process twice daily for the best results.
You can also try mixing aloe vera gel with other natural ingredients like honey or lemon juice to boost its skin-lightening effects. Just be sure to do a patch test first to make sure your skin doesn’t react negatively to the mixture.
If you don’t have access to fresh aloe vera, you can also use store-bought aloe vera gel. Just make sure to choose a product that’s pure and doesn’t contain any added fragrances or dyes.
4. Dab on Some Apple Cider Vinegar
Apple cider vinegar contains acetic acid. It can help lighten age spots by exfoliating the skin and reducing the production of melanin.
To use apple cider vinegar for age spots, mix equal parts apple cider vinegar and water in a bowl. Dip a cotton ball into the mixture and apply it directly to the age spots. Let it sit for a few minutes before rinsing off with lukewarm water. Repeat this process once or twice a day until you see results.
If you have sensitive skin, you may want to dilute the apple cider vinegar with more water to reduce the risk of irritation. You can also try mixing apple cider vinegar with other natural ingredients like honey or green tea to boost its skin-lightening effects.
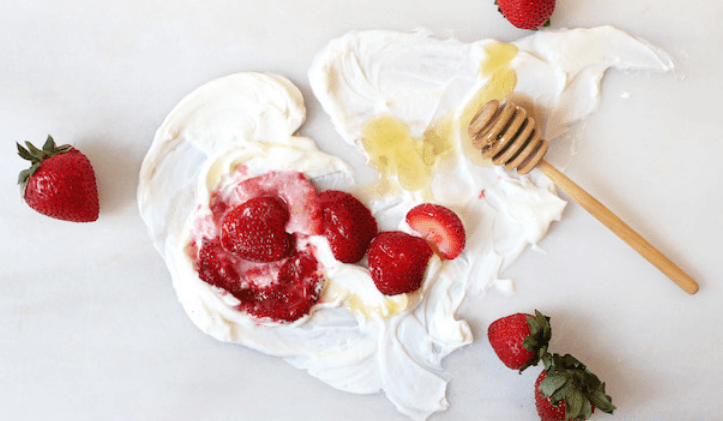
5. Make a Lemon Juice Mask
Lemons are rich in citric acid. This is a natural bleaching agent that can help fade age spots and brighten the skin.
To make a lemon juice mask, simply squeeze the juice of one lemon into a bowl and add enough sugar or honey to create a paste. Apply the mixture to your face, focusing on the areas with age spots.
Then let it sit for 15-20 minutes before rinsing off with lukewarm water. Repeat this process once or twice a week for the best results.
You can also try mixing lemon juice with other natural ingredients like yogurt or oatmeal to create a more nourishing mask. Just be sure to do a patch test first to make sure your skin doesn’t react negatively to the mixture.
It’s important to note that lemon juice can make your skin more sensitive to the sun, so be sure to use sunscreen religiously if you’re using this remedy. You should also avoid using lemon juice if you have open wounds or cuts on your skin, as it can cause stinging and irritation.
6. Treat Your Skin to a Yogurt Mask
Yogurt contains lactic acid. It is a type of alpha-hydroxy acid (AHA) that can help exfoliate the skin and fade age spots.
To make a yogurt mask, simply apply plain, unsweetened yogurt directly to your face and let it sit for 15-20 minutes before rinsing off with lukewarm water. Repeat this process once or twice a week for the best results.
You can also try mixing yogurt with other natural ingredients like honey, turmeric, or lemon juice to boost its skin-lightening effects. Just be sure to do a patch test first to make sure your skin doesn’t react negatively to the mixture.
In addition, Yogurt is also rich in probiotics, which can help balance the bacteria on your skin and reduce inflammation. This can be especially beneficial if you have acne-prone or sensitive skin.
7. Harness the Power of Papaya
Papaya contains an enzyme called papain. It can help exfoliate the skin and reduce the appearance of age spots.
To use papaya for age spots, simply mash up a ripe papaya and apply it directly to your face. Let it sit for 15-20 minutes before rinsing off with lukewarm water. Repeat this process once or twice a week for the best results.
You can also try mixing mashed papaya with other natural ingredients like honey, lemon juice, or yogurt to create a more nourishing mask. Just be sure to do a patch test first to make sure your skin doesn’t react negatively to the mixture.
Plus, Papaya is rich in antioxidants like vitamin C and lycopene. They can help protect the skin from free radical damage and promote a more even skin tone. READ FULL STORY HERE>>>CLICK HERE TO CONTINUE READING>>>
8. Give Tomatoes a Try
Tomatoes are rich in lycopene, a powerful antioxidant that can help protect the skin from sun damage and fade age spots.
To use tomatoes for age spots, simply cut a tomato in half and rub the cut side directly onto the affected areas. Let the juice sit on your skin for 15-20 minutes before rinsing off with lukewarm water. Repeat this process once or twice a day for the best results.
You can also try mixing tomato juice with other natural ingredients like lemon juice or yogurt to create a more nourishing mask.
Tomatoes are also rich in vitamin C, which can help boost collagen production and promote a more youthful-looking complexion.
If you have sensitive skin, you may need to dilute the tomato juice with water or another soothing ingredient like aloe vera gel to reduce the risk of irritation.
9. Experiment with Essential Oils
Certain essential oils, such as frankincense and lavender, have skin-lightening properties that can help fade age spots.
To use essential oils for age spots, simply mix a few drops of your chosen oil with a carrier oil like coconut or jojoba oil. Apply the mixture directly to the affected areas and let it sit for 15-20 minutes before rinsing off with lukewarm water. Repeat this process once or twice a day for the best results.
You can also try adding a few drops of essential oil to your favorite moisturizer or serum to boost its skin-lightening effects.
It’s important to note that essential oils are highly concentrated and can cause skin irritation or allergic reactions in some people. Always do a patch test before applying any new essential oil to your skin.
10. Consider Microdermabrasion
Microdermabrasion is a professional treatment. It uses a special device to gently sand away the top layer of skin, revealing the smoother, more even-toned skin underneath.
During the treatment, a handheld device is used to spray fine crystals onto the skin. This process can help improve the appearance of age spots, as well as fine lines, wrinkles, and acne scars.
Microdermabrasion is typically performed by a dermatologist or esthetician. It can be done as a standalone treatment or in combination with other skin care treatments like chemical peels or laser therapy.
Note: While microdermabrasion is generally safe for most skin types, it can cause some temporary redness and sensitivity.
11. Try a Chemical Peel
Chemical peels are a solution to the skin that causes the top layer to peel off, revealing the smoother, more even-toned skin underneath.
There are different types of chemical peels, ranging from mild to deep. The type that’s right for you will depend on your skin type and the severity of your age spots.
Mild peels, such as glycolic acid or lactic acid peels, can be done at home or by an esthetician. Deeper peels, such as trichloroacetic acid (TCA) peels, should only be performed by a qualified dermatologist.
Chemical peels can be an effective way to fade age spots and improve overall skin texture and tone. However, they can also cause side effects like redness, swelling, and peeling. So it may not be suitable for all skin types.
12. Laser Therapy
Laser therapy uses a special device to target age spots with intense pulses of light. This can help break up the excess pigment and fade the spots over time.
There are different types of laser treatments available, including ablative and non-ablative lasers. Ablative lasers, such as carbon dioxide (CO2) lasers, remove the top layer of skin and can be effective in treating deep wrinkles and severe age spots.
Non-ablative lasers, such as intense pulsed light (IPL) or fractional lasers, heat up the skin without removing the top layer. It can be effective for treating milder age spots and other skin concerns.
Laser therapy is typically performed by a dermatologist or plastic surgeon. It can be done as a standalone treatment or in combination with other skin care treatments like chemical peels or microdermabrasion.
While laser therapy can be an effective way to fade age spots and improve overall skin tone and texture, it can also cause side effects like redness, swelling, and peeling.
13. Consider Cryotherapy
Cryotherapy involves using liquid nitrogen to freeze age spots. This causes them to blister and eventually peel off, revealing the smoother, more even-toned skin underneath.
During the treatment, your dermatologist will apply liquid nitrogen to the age spots using a cotton swab or spray device. The liquid nitrogen freezes the skin cells, causing them to die and eventually peel off.
Cryotherapy is typically performed by a dermatologist and can be an effective way to fade age spots. However, it can also cause side effects like redness, swelling, and blistering, and may not be suitable for all skin types.
14. Talk to Your Dermatologist
If you’re concerned about age spots on your face, it’s always a good idea to talk to a dermatologist. They can help you determine the best course of treatment for your individual needs, whether that’s a simple home remedy or a more advanced professional treatment.
During your consultation, your dermatologist will examine your skin and ask about your medical history and any medications you’re taking. They may also perform a skin biopsy to rule out any underlying skin conditions or precancerous lesions.
When to See a Doctor?
While age spots are usually harmless, there are some cases where it’s important to see a doctor. If you notice any of the following changes in your age spots, make an appointment with your dermatologist right away:
- The spot is growing rapidly or changing in size, shape, or color
- The spot is painful, itchy, or bleeding
- The spot has an irregular border or is asymmetrical
- The spot is black or has multiple colors
- The spot is larger than a pencil eraser (6mm)
These changes could be a sign of skin cancer, such as melanoma. This may require prompt medical attention.

-

 ENTERTAINMENT9 months ago
50-year-old Alyssa Milano is embracing her age, showcasing her natural looks on her birthday: “No filter. No touching up.
-
 METRO9 months ago
We thought we were being haunted by ghosts –Tenants of house where boy was found inside the wall
-

 METRO5 months ago
No One Has Entered The Old Warehouse For 25 Years! What They Find Inside Will Shock You –
-

 SPORTS8 months ago
Olympic father in the twilight: “In reality, Coubertin is more than a fraud, he is an opportunist”
-

 SPORTS9 months ago
Is Alexander Prass Destined for the German Bundesliga?
-

 IN-THE-NEWS9 months ago
Church Sanctioned, Set To Vacate Premises After Attack On Muslim Family In Oyo
-
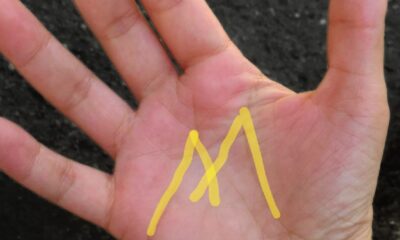
 METRO5 months ago
What It Means If The Lines On Your Hand Form The Letter ‘M’
-

 METRO8 months ago
I Visited My Dying Boyfriend At The Hospital Only To Meet The Shock Of My Life