Connect with us

HEALTH & LIFESTYLE

10 natural methods to whiten your teeth at home

Published

on

By

Having a bright, white smile can boost your confidence and make you look younger and more attractive. However, teeth can become stained and yellowed over time due to factors like aging, foods and drinks, smoking, and poor dental hygiene. While there are many commercial teeth whitening products available, they can be expensive and may cause sensitivity. Luckily, there are several natural and affordable ways to get whiter teeth from the comfort of your own home. Here are 10 natural methods to whiten your teeth at home:
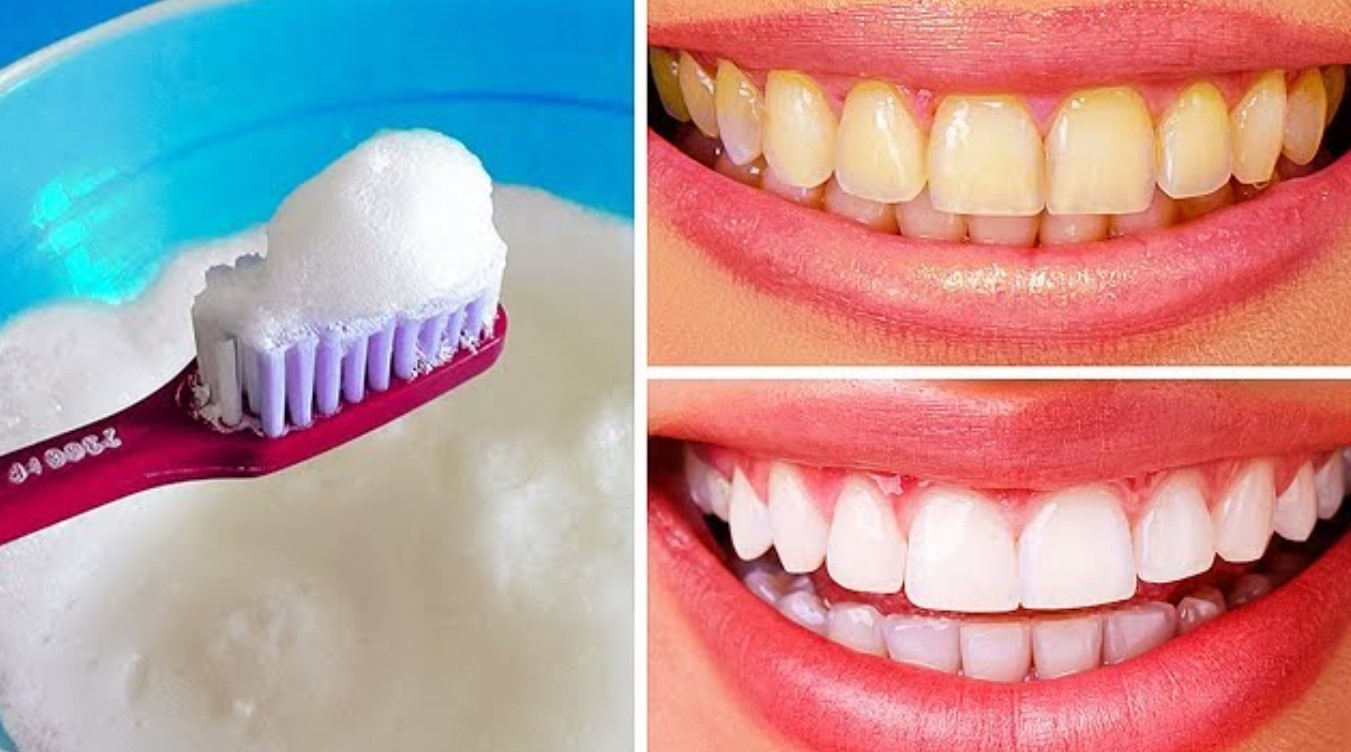
Teeth Whitening with Lemon, Baking Soda at Home - 6 Effective Remedies

1. Baking Soda
Baking soda is a mild abrasive that can help remove surface stains from teeth when used as a tooth polish. To whiten with baking soda, simply make a paste by mixing it with a little water. Use a soft-bristled toothbrush to gently brush the paste onto your teeth, scrubbing in circular motions for 1-2 minutes before rinsing thoroughly. Be careful not to brush too hard, as baking soda can wear down tooth enamel over time.

2. Hydrogen Peroxide
Hydrogen peroxide is a natural bleaching agent found in many commercial teeth whitening products. When used carefully, it can help lift stains and brighten tooth enamel. Dilute some 3% hydrogen peroxide with an equal amount of water, dip a cotton ball into the solution, and apply it directly onto your teeth for up to 60 seconds before rinsing and brushing thoroughly. Avoid swallowing any of the hydrogen peroxide solution.

3. Apple Cider Vinegar
The acetic acid in raw, unfiltered apple cider vinegar can help remove stains and whiten teeth naturally. Add 1-2 tablespoons of vinegar to a glass of water, swish it around in your mouth for 1 minute, then rinse thoroughly. You can also use a toothbrush to gently brush the vinegar solution directly onto your teeth before rinsing. Be careful, as the acid in vinegar can erode tooth enamel if used excessively.

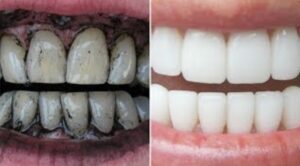
4. Activated Charcoal
While it may seem counterintuitive, activated charcoal can help absorb plaque and other compounds that stain teeth. Simply crush up a charcoal capsule or tablet, wet your toothbrush, dip it in the charcoal powder, and gently brush your teeth for 2-3 minutes before rinsing thoroughly. The charcoal may temporarily stain your teeth black, but brushing with regular toothpaste afterward should reveal a brighter smile.

5. Coconut Oil Pulling
Oil pulling is an ancient Ayurvedic technique that involves swishing oil around in your mouth for 15-20 minutes to help remove plaque, toxins, and stains from your teeth. Coconut oil is antimicrobial and is a popular choice for oil pulling at home. Simply put a tablespoon of virgin coconut oil into your mouth, swish it around while pulling it through your teeth, then spit it out after 15-20 minutes and thoroughly brush.

6. Fruit Peels
Fruit peels like banana, orange, or lemon contain acids and enzymes that can help remove stains and whiten teeth naturally. For example, simply rub the inside of a banana peel directly onto your teeth for 2 minutes before rinsing thoroughly. Alternatively, you can create a paste by combining dried fruit peels with baking soda and a bit of water or coconut oil. READ FULL STORY HERE>>>CLICK HERE TO CONTINUE READING>>>

7. Sea Salt
Sea salt acts as an abrasive to gently scrub away surface stains while leaving tooth enamel intact. Plus, it contains minerals that can help remineralize your teeth. Make a salt scrub by mixing a teaspoon of sea salt with your regular toothpaste, then brush with it 2-3 times per week for whiter, brighter teeth.

8. Turmeric Powder
While turmeric may seem like an unlikely teeth whitener, this yellow spice contains active compounds called curcuminoids that can actually help remove stains and whiten tooth enamel. Use a soft toothbrush to brush a bit of turmeric powder directly onto your teeth, let it sit for 2-3 minutes, then rinse thoroughly. Be careful, as turmeric can temporarily stain fabrics.

9. Strawberries
The malic acid found in strawberries acts as an astringent to remove surface discoloration and whiten teeth. You can simply mash up a few strawberries, spread the pulp onto your teeth, let it sit for 5 minutes, then rinse. You can also add a bit of baking soda to make a paste for extra whitening power.

10. Practice Good Oral Hygiene
Of course, the simplest and most effective way to keep your teeth looking their whitest is to practice good oral hygiene habits. This includes brushing twice per day with a whitening toothpaste, flossing once daily, drinking plenty of water, and avoiding staining culprits like coffee, red wine, and smoking. Be sure to also schedule regular dental cleanings.

While these natural methods can help brighten your smile at home, it’s important to have realistic expectations. Most natural teeth whitening results will be gradual and more subtle compared to professional bleaching treatments. However, they are affordable, easy to do at home, and are generally safe when used properly.

Here are some additional tips when trying natural teeth whitening methods:

– Be patient and consistent. It may take several weeks or months of regular use to notice results.
– Don’t overdo it, as most acids and abrasives can damage your enamel if used too frequently.
– Rinse thoroughly after any whitening treatments and brush with plain water after to remove residues.
– Stay hydrated by drinking plenty of water after whitening to help remineralize your teeth.
– Never leave acidic whitening agents like fruit peels or vinegar on your teeth for more than a few minutes.
– Use a soft-bristled toothbrush and whitening toothpaste daily to maintain results.

If you have very stubborn, deep-set stains, it may be worth seeing your dentist for professional whitening treatments that can get longer-lasting, more dramatic results. However, for minor tooth discoloration and maintenance between professional treatments, these natural whitening methods are excellent options to try at home.

READ FULL STORY HERE>>...CLICK HERE TO CONTINUE READING>>>
Continue Reading
Click to comment

Leave a Reply

Your email address will not be published. Required fields are marked *

HEALTH & LIFESTYLE

Sweet and Spicy: The Incredible Benefits of Mixing Cloves with Honey

Published

on

By

In the realm of natural health remedies, the combination of cloves and honey stands out for its unique blend of flavor and benefits. Each ingredient is powerful on its own, but together, they create a synergy that can enhance your wellness in surprising ways. Here’s why incorporating a daily dose of cloves mixed with honey into your routine can be a game-changer for your health…Click Here To Continue Reading>> …Click Here To Continue Reading>>


1. Boosts Immune System:

Cloves are packed with antioxidants and have antimicrobial properties, which can help fight off pathogens and protect the body from infections. Honey, a natural antibacterial agent, enhances this protective effect. Together, they form a first line of defense against common illnesses.

2. Improves Digestion:

Both honey and cloves are known for their ability to aid digestion. Honey is a prebiotic, which means it nurtures the good bacteria in the gut. Cloves, on the other hand, can help reduce bloating and settle digestive disturbances. This combination is particularly soothing after a large meal.

3. Reduces Inflammation:

Cloves contain eugenol, a compound with potent anti-inflammatory properties. Honey complements this by also acting as an anti-inflammatory agent. Regular consumption can help alleviate chronic inflammation, a root cause of many serious diseases.

4. Dental Health:

Eugenol in cloves is also excellent for dental care. It not only reduces gum pain but also limits bacterial growth in the mouth. Mixed with honey, it can be applied to the gums or used as a mouthwash to reduce pain and infection.

5. Antioxidant Rich:

Both cloves and honey are rich in antioxidants, which combat free radicals in the body. This can lead to reduced oxidative stress and a lower risk of chronic diseases. READ FULL STORY HERE>>>CLICK HERE TO CONTINUE READING>>>

6. Natural Pain Reliever:

The combination of honey and cloves works as a natural pain reliever. It’s especially effective for sore throats and headaches. A teaspoon can soothe the throat or calm a headache naturally without the need for over-the-counter medications.

7. Enhances Skin Health:

Applied topically, this mix can reduce skin inflammation, treat acne, and improve overall skin health due to its antibacterial and soothing properties.

To enjoy these benefits, simply mix a teaspoon of ground cloves with a tablespoon of honey each day. You can consume it directly, or add it to warm water or tea for a comforting beverage. This delightful mixture not only improves health but also warms the spirit with its rich, spicy-sweet flavor. Embrace this simple, natural remedy and feel the difference in your daily life!

The post Sweet and Spicy: The Incredible Benefits of Mixing Cloves with Honey appeared first on Timeless Life.


READ FULL STORY HERE>>...CLICK HERE TO CONTINUE READING>>>
Continue Reading

HEALTH & LIFESTYLE

Beetroot & Carrot Juice Made Easy: No Juicer Required!

Published

on

By

If you’re looking for a delicious way to boost your vitality, beetroot and carrot juice is a fantastic option. This vibrant juice is not only bursting with nutrients but also incredibly simple to prepare at home using just a blender. No need for a juicer! Here’s how you can whip up this healthy, easy-to-make drink in no time.

Benefits of Beetroot and Carrot Juice

Beetroot and carrot are known for their health-enhancing properties. Beetroot is rich in iron, potassium, and vitamin C, and is famous for its ability to support blood flow and lower blood pressure. Carrots are a great source of beta-carotene, fibers, vitamin K1, and antioxidants, making them excellent for eye health and immune support. Combining these two vegetables not only creates a tasty beverage but also a powerful nutrient cocktail…Click Here To Continue Reading>> …Click Here To Continue Reading>>


Ingredients

To make two servings of this wholesome juice, you will need:

  • 2 medium beetroots
  • 4 large carrots
  • 1-2 inches of fresh ginger (optional, for a spicy kick)
  • Water (to help blend the mixture)
  • Ice cubes (optional, for serving)
  • Lemon juice (optional, for added zest)

Equipment

  • Blender
  • Fine mesh strainer or cheesecloth
  • Large bowl
  • Spoon
  • Serving glasses
For illustration purposes only

Instructions

1. Prepare the Vegetables:

  • Wash the beetroots and carrots thoroughly to remove any dirt and pesticides. Peel them if they’re not organic.
  • Roughly chop the beetroots, carrots, and ginger into chunks. Smaller pieces blend more easily.

2. Blending:

  • Place the chopped vegetables and ginger into the blender.
  • Add enough water to cover the bottom of the blender (about half a cup), which will help in achieving a smooth blend.
  • Blend on high until everything is finely pureed.

3. Straining the Juice:

  • Place your strainer or cheesecloth over a large bowl.
  • Pour the blended mixture through the strainer, using a spoon to press down and extract as much juice as possible.
  • Continue to strain until all liquid is extracted, and only pulp remains.

4. Finishing Touches:

  • If desired, squeeze some fresh lemon juice into the strained juice for an extra zing.
  • Serve the juice over ice cubes for a refreshing drink.

Storage Tips

This juice is best enjoyed fresh, but you can store it in the refrigerator for up to 24 hours. Make sure it’s in a sealed container to maintain its nutritional value and freshness. READ FULL STORY HERE>>>CLICK HERE TO CONTINUE READING>>>

Conclusion

Making your own beetroot and carrot juice at home is not only cost-effective but also a fun and easy way to add more nutrients to your diet. This juice is perfect for a morning boost or an afternoon pick-me-up. Enjoy the natural sweetness and health benefits of these amazing vegetables any day of the week!

The post Beetroot & Carrot Juice Made Easy: No Juicer Required! appeared first on Timeless Life.


READ FULL STORY HERE>>...CLICK HERE TO CONTINUE READING>>>
Continue Reading

HEALTH & LIFESTYLE

Pour Vinegar on Your Feet and Watch What Happens: A Genius Trick!

Published

on

By

Vinegar is a versatile household item with many uses, but did you know that pouring it on your feet can bring a host of benefits? This simple and genius trick can address various foot issues and leave your feet feeling refreshed and rejuvenated. Here’s why you should consider adding vinegar to your foot care routine and what you can expect…Click Here To Continue Reading>> …Click Here To Continue Reading>>


Why Vinegar?

Vinegar, especially apple cider vinegar, is rich in acetic acid, which gives it strong antibacterial, antifungal, and deodorizing properties. It’s been used in traditional medicine for centuries to treat various ailments, and its benefits extend to foot care as well.

Benefits of Using Vinegar on Your Feet:

1. Fights Foot Odor: Vinegar’s natural antibacterial properties can help eliminate the bacteria that cause foot odor. Soaking your feet in a vinegar solution can leave them smelling fresh and clean.

2. Treats Athlete’s Foot: The antifungal properties of vinegar make it an effective remedy for athlete’s foot. Regular vinegar soaks can help combat the fungus and soothe itching and irritation.

3. Softens Calluses and Dry Skin: Vinegar can help soften tough calluses and dry skin on your feet. The acetic acid gently exfoliates, leaving your feet smoother and softer after a soak.

4. Soothes Sore Feet: After a long day, soaking your feet in a vinegar solution can provide relief from soreness and fatigue. The soothing properties of vinegar can help reduce inflammation and relax tired muscles. READ FULL STORY HERE>>>CLICK HERE TO CONTINUE READING>>>

For illustration purposes only

How to Use Vinegar for Foot Care:

1. Prepare the Solution: In a basin or large bowl, mix one part vinegar with two parts warm water. You can use either white vinegar or apple cider vinegar.

2. Soak Your Feet: Submerge your feet in the solution and soak for 15-20 minutes. Make sure the water covers your feet completely.

3. Rinse and Dry: After soaking, rinse your feet with clean water and dry them thoroughly. You can follow up with a moisturizer to keep your feet hydrated.

Additional Tips:

  • Regular Use: For best results, incorporate vinegar foot soaks into your routine a few times a week.
  • Add Essential Oils: For an extra touch of relaxation, add a few drops of essential oils like lavender or tea tree oil to the vinegar solution.
  • Consult Your Doctor: If you have any skin conditions or allergies, it’s always a good idea to consult your healthcare provider before trying new remedies.

Conclusion:

Pouring vinegar on your feet is a simple and effective trick that can bring numerous benefits, from fighting foot odor to treating athlete’s foot and softening calluses. This easy remedy is a fantastic addition to your foot care routine, leaving your feet feeling fresh, soft, and rejuvenated. Give it a try and watch what happens—you might be pleasantly surprised by the results!

The post Pour Vinegar on Your Feet and Watch What Happens: A Genius Trick! appeared first on Timeless Life.


READ FULL STORY HERE>>...CLICK HERE TO CONTINUE READING>>>
Continue Reading

Trending

error: Content is protected !!